
How to Format Laptop Windows 10 and 7 – Step by Step Guide

In the digital world we live in, the need to refresh, reset, or completely overhaul our computers is almost inevitable. Whether it’s due to sluggish performance, malware issues, or preparing a second-hand device, formatting is the surgical approach to restoring vitality to your system. This comprehensive guide will be your go-to resource for all things related to formatting. We cover a wide range of how to format Laptop for Windows 7 & 10. Each topic is guided through a meticulously detailed step-by-step process, making it foolproof for users at all levels of technical proficiency. Read on to bring your system back to its prime, or prepare your drives for a fresh start.
1 How to format Windows 10
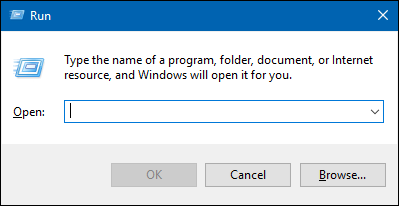
Step 1:
Press the [Windows] and [R] keys simultaneously so that the “Run” command opens.
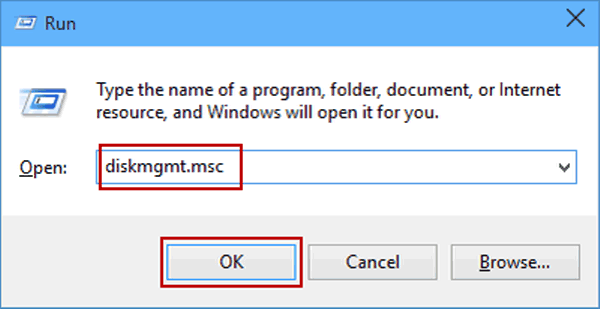
Step 2:
Enter “diskmgmt.msc” in Run Window and hit “OK”. Then the disk management opens.
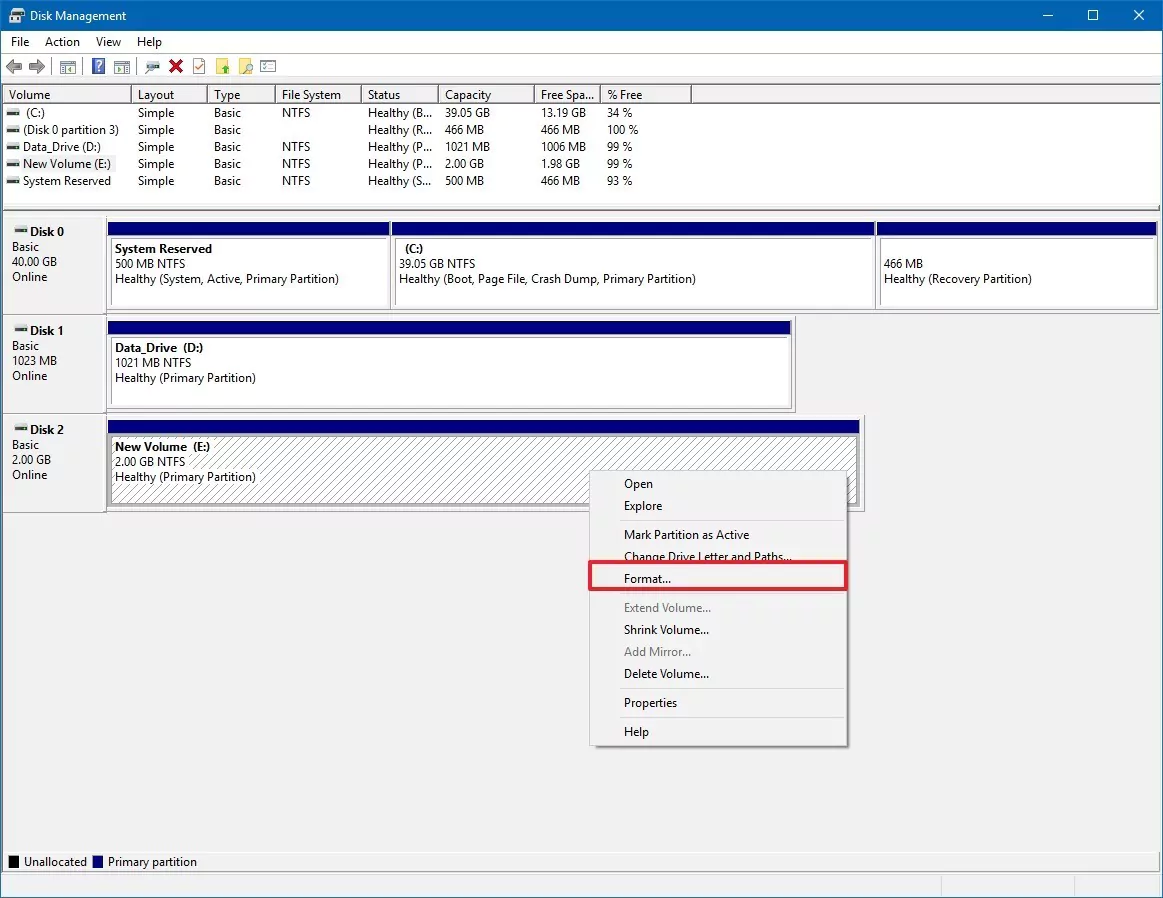
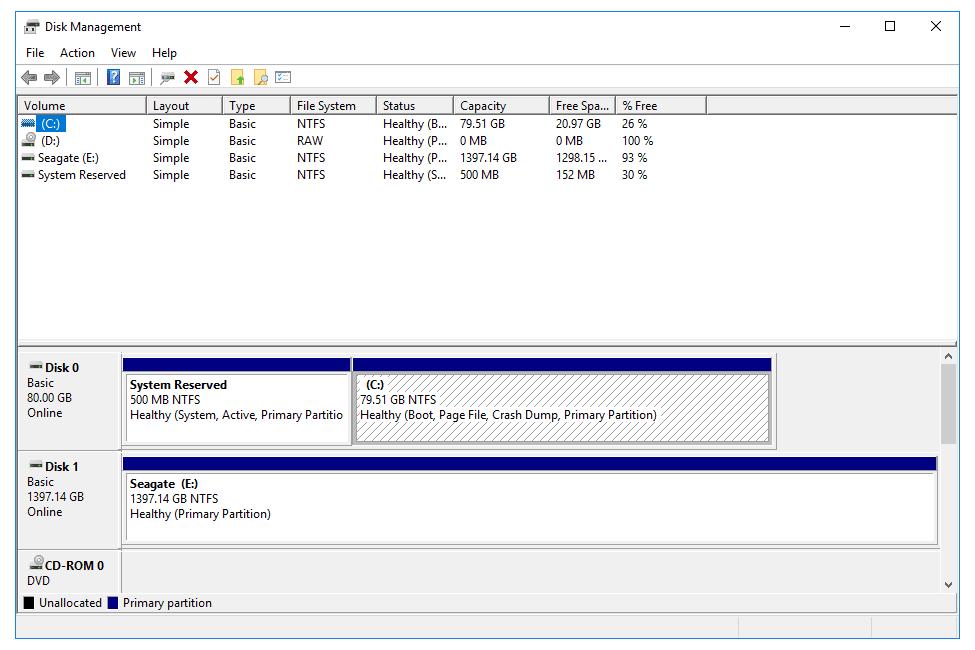
Step 3:
Now you will see the list of all HDD in the disk management menu. On the basis of the name and size, you can find the required hard drive here.
Step 5:
Confirm by clicking the ‘OK’ option; the HDD is formatted. Depending on the HDD’s size, this process may take a few minutes to few hours.
Step 4:
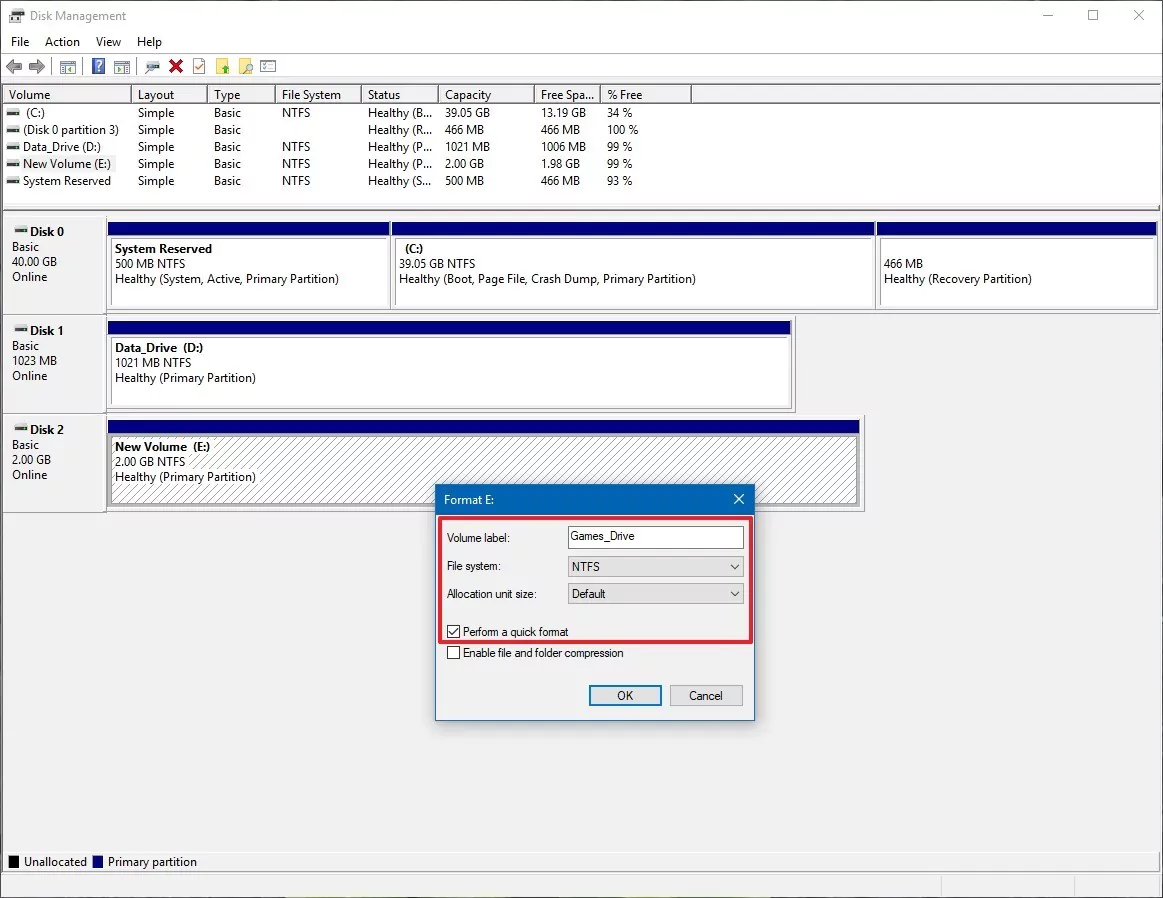
Right-click on the Hard drive that you want to format. Then select the Format option
2 How to format External Hard Drive Windows 10
You can also format external hard drives in Windows 10. However, you do this a little differently.
Step 1:
Simultaneously press the [Windows] and [E] keys to open Explorer. Go to the “This PC” area on the left.
Step 2:
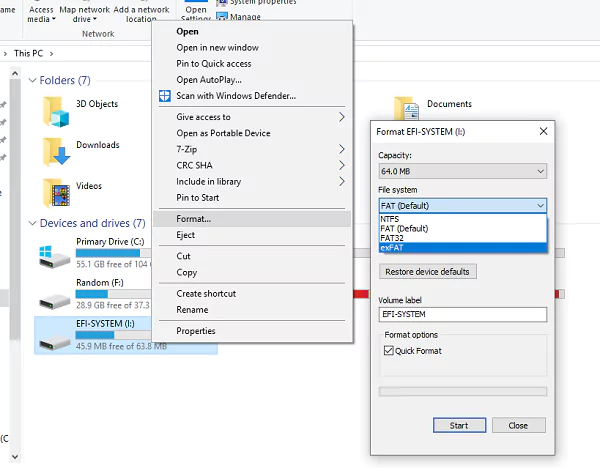
Right-click on the hard disk and select the “Format” option in the context menu.
Step 3:
Click on the “Restore device standards” button and make further settings if necessary. If you have no special requirements, you can now format the hard disk using the “Start” button.
3 How to format Windows 7
If you want to format the partition on which Windows 7 is installed, you have to reinstall the operating system completely. Think carefully about this step, because all settings, programs and data will be lost!
Step 1:
Before you start reinstalling Windows 7, you should first back up your most important files. Don’t forget documents, pictures, emails or possibly saves. Save everything on an external hard drive or a USB stick. For security reasons, rerun an anti-virus program so that your new Windows is virus-free right from the start.
Step 2:
Now insert the Windows 7 DVD in your PC drive and restart the computer. Now you have to change the boot order so that your PC boots from the DVD. To do this, press the “Del” or “F2” key in the BIOS during the boot process – the key depends on the BIOS used. In the “Boot Priority” menu that opens, select your drive or DVD and confirm. Make sure that you first save the changes in the BIOS and later reset them to the hard disk.
Step 3:
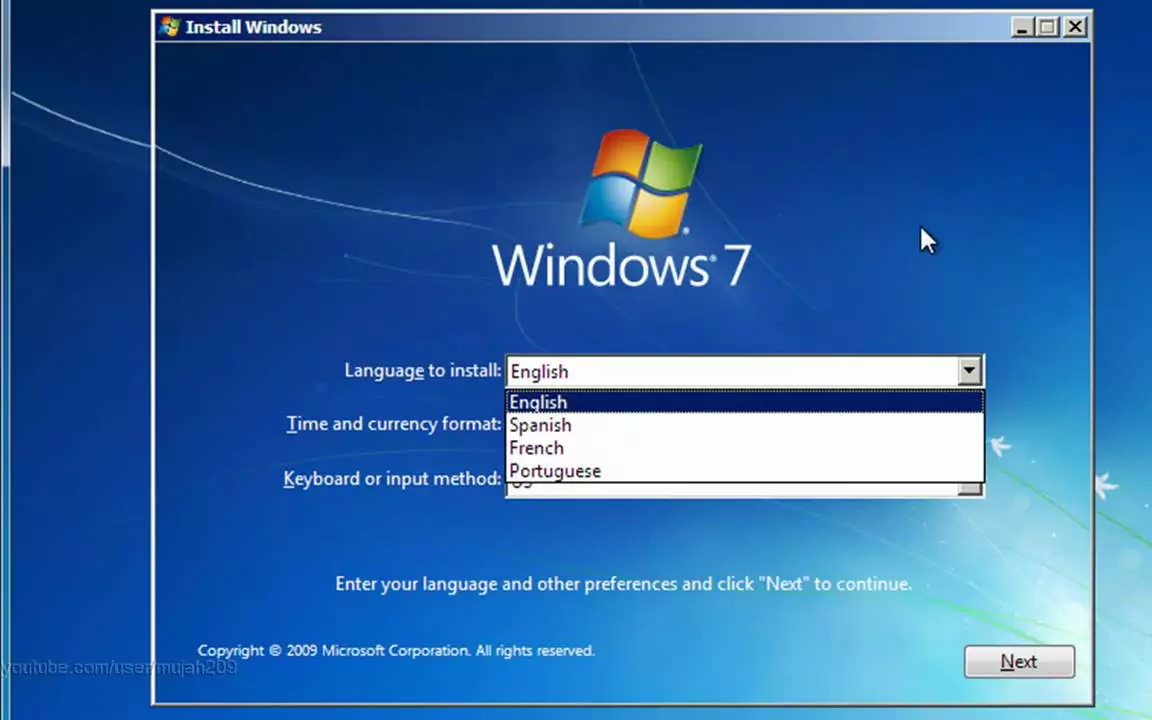
Now the Windows installation starts. First, the “Install Windows” window opens. Here you select your preferred language, the time and currency format as well as the keyboard layout. Unless otherwise requested, set everything to “English” and click on “Next” and then on “Install now”. After starting the setup, read the license terms, accept them by clicking the small box below the license and confirm with “Next”.
Step 4:
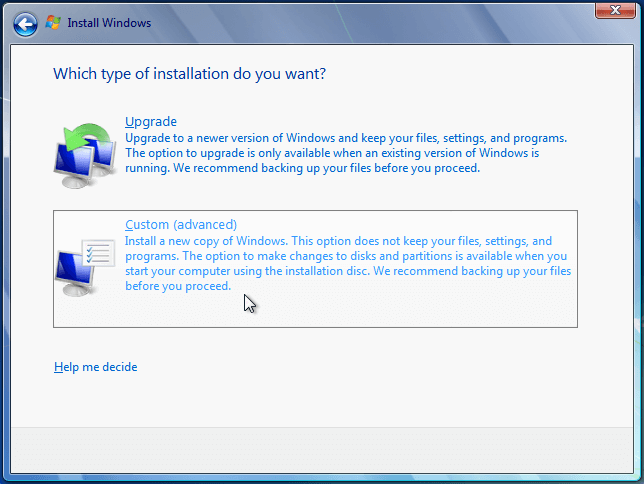
Now select the type of installation. Since you want to reinstall Windows 7 completely, click on “Custom (extended)”. Now select the respective partitions or hard disks and format them first by clicking on “Drive options (extended)” and then on “Format”. Once you have formatted all hard drives, select the hard drive or partition on which you want to install Windows. Then click “Next” again.
Step 5:
What follows is the actual installation and update of Windows 7. This process can take some time. If there are no problems, Windows will restart the computer twice during the installation. After the second restart, Windows will ask you for some input.
Step 6:
First, you need to provide a username and a computer name. Confirm your entries with “Next”. This is followed by entering the user password, which can optionally be set up for your Windows user account. Now define the update settings for Windows 7. For optimal protection of your system, the “recommended settings” should be used.
Step 7:
The date and time settings follow. As soon as these have been made, click “Next” again. Finally, if your computer is already connected to a network, Windows will ask you to confirm the network settings. As soon as you have completed this last step, you have successfully installed Windows.
4 How to format Hard Drive Windows 7
If you want to format a hard drive that only contains data and not the operating system, this is quickly done. Usually, Windows 7 is installed on the hard disk partition “C:”. It cannot be formatted in this way.
Step 1:
Open the “Computer” window (formerly “My Computer”) from the Start menu.
Step 2:
Select the hard drive you want to format from the list of
drives.
Step 3:
Right-click on the hard drive and select “Format”.
Step 4:
A new window opens (see screenshot). There you can change the name of the hard disk or the file system. Usually, you can keep all settings.
Step 5:
Click “Start” to have Windows 7 format the hard drive. The process can take a few minutes. All data from this hard disk partition will be deleted.
Tip: As a rule, “quick format” is sufficient, which usually only takes a few seconds. To do this, check the box below “Format options”.
5 How to format Windows 7 without CD
Before performing the reset, you should back up your data. Otherwise, all data will be lost. The following instructions start the reset fastest but do not work on all computers. If this is the case for you, simply follow the instructions in the next paragraph.
Step 1:
First of all, you have to start the PC in recovery mode. Press the [F9] or [F11] key repeatedly during startup.
Step 2:
Which button you use to go into recovery mode is often shown in the first few seconds of the start. Alternatively, try all other F keys.
Step 3:
If Windows starts up usually, switch off the PC and try again.
Step 4:
When you have reached the menu, select the “Restore” item.
Step 5:
If you follow the further instructions, Windows 7 will be reset to the factory settings.
Frequently asked Questions about How to Format Windows 10 & 7
How can I reset Windows 7 to factory settings?
1. Open the Control Panel and click on “System and Security”, then on “Backup and Restore”.
2. There you click on the option “Restore system settings on the computer”.
Does formatting my laptop remove the Windows operating system?
Yes, formatting your laptop’s primary drive where Windows is installed will effectively delete the operating system and all the files associated with it. After the formatting process, you’ll be left with a blank drive. This means you’ll need to reinstall Windows from a bootable USB drive or another installation medium to use the laptop again.
What happens to my files and applications?
Formatting will erase all data on the drive, including your personal files, applications, and settings. Make sure to backup all important data before proceeding with the format.
Is there a way to format my laptop without losing Windows?
If you’re looking to clean up your system but don’t want to lose Windows, consider using the ‘Reset this PC’ feature in Windows 10 or similar features in other versions. This will restore Windows to its initial state, removing your personal files and apps, but keeping the operating system intact.
Can I reinstall Windows after formatting?
Absolutely. Once the primary drive is formatted, you can reinstall Windows using a bootable USB drive, a DVD, or other installation media. You’ll need a valid product key to activate it.
Is it necessary to format the laptop to install a new version of Windows?
Not necessarily. You can usually upgrade to a new version of Windows without formatting, although a clean install (which involves formatting your drive first) is often recommended for the best performance.
Will formatting remove viruses and malware?
Formatting your primary drive will remove all files, including any viruses or malware. However, ensure that your new Windows installation is secure by installing a reputable antivirus program right away.
Community Q&A
About This Article

Hardik Jethva is an experienced author of the BestCheck family. Working from scratch, he has developed an amazing interest in testing and writing about different products in a transparent manner. His writing skills got more audience for BestCheck. Apart from his professional life, Hardik has his eyes on travelling, meditation, eating healthy food, socializing with people, and car rides.
This article has been viewed 2443 times.

Featured Articles
 7 Best Laptops under 30000 Rupees to Buy in 2024
 How to Connect Bluetooth Speaker to Laptop – Step by Step Guide