
DIY Guide: How to Remove a Woodruff Key in 5 Easy Steps?
A woodruff key is a small but essential component of many types of machinery, including cars, motorcycles, and power tools. These keys are designed to keep gears, pulleys, and other rotating components from slipping on a shaft, ensuring that they rotate together and transmit power smoothly and efficiently.
Over time, however, woodruff keys can become damaged or worn out, and when this happens, they need to be replaced. This is a relatively simple process, but it does require some basic knowledge of machinery and the use of specific tools and techniques.
In this blog, we will provide a step-by-step guide to removing a woodruff key from a shaft. We’ll discuss what tools you’ll need, how to identify the key, and how to safely remove it without damaging the shaft or other components. We’ll also cover some tips for removing a stubborn or stuck woodruff key and offer some safety considerations to keep in mind throughout the process. By the end of this blog, you’ll have the knowledge and confidence you need to remove and replace a woodruff key and keep your machinery running smoothly.
1 Detailed steps to remove the Woodruff Key
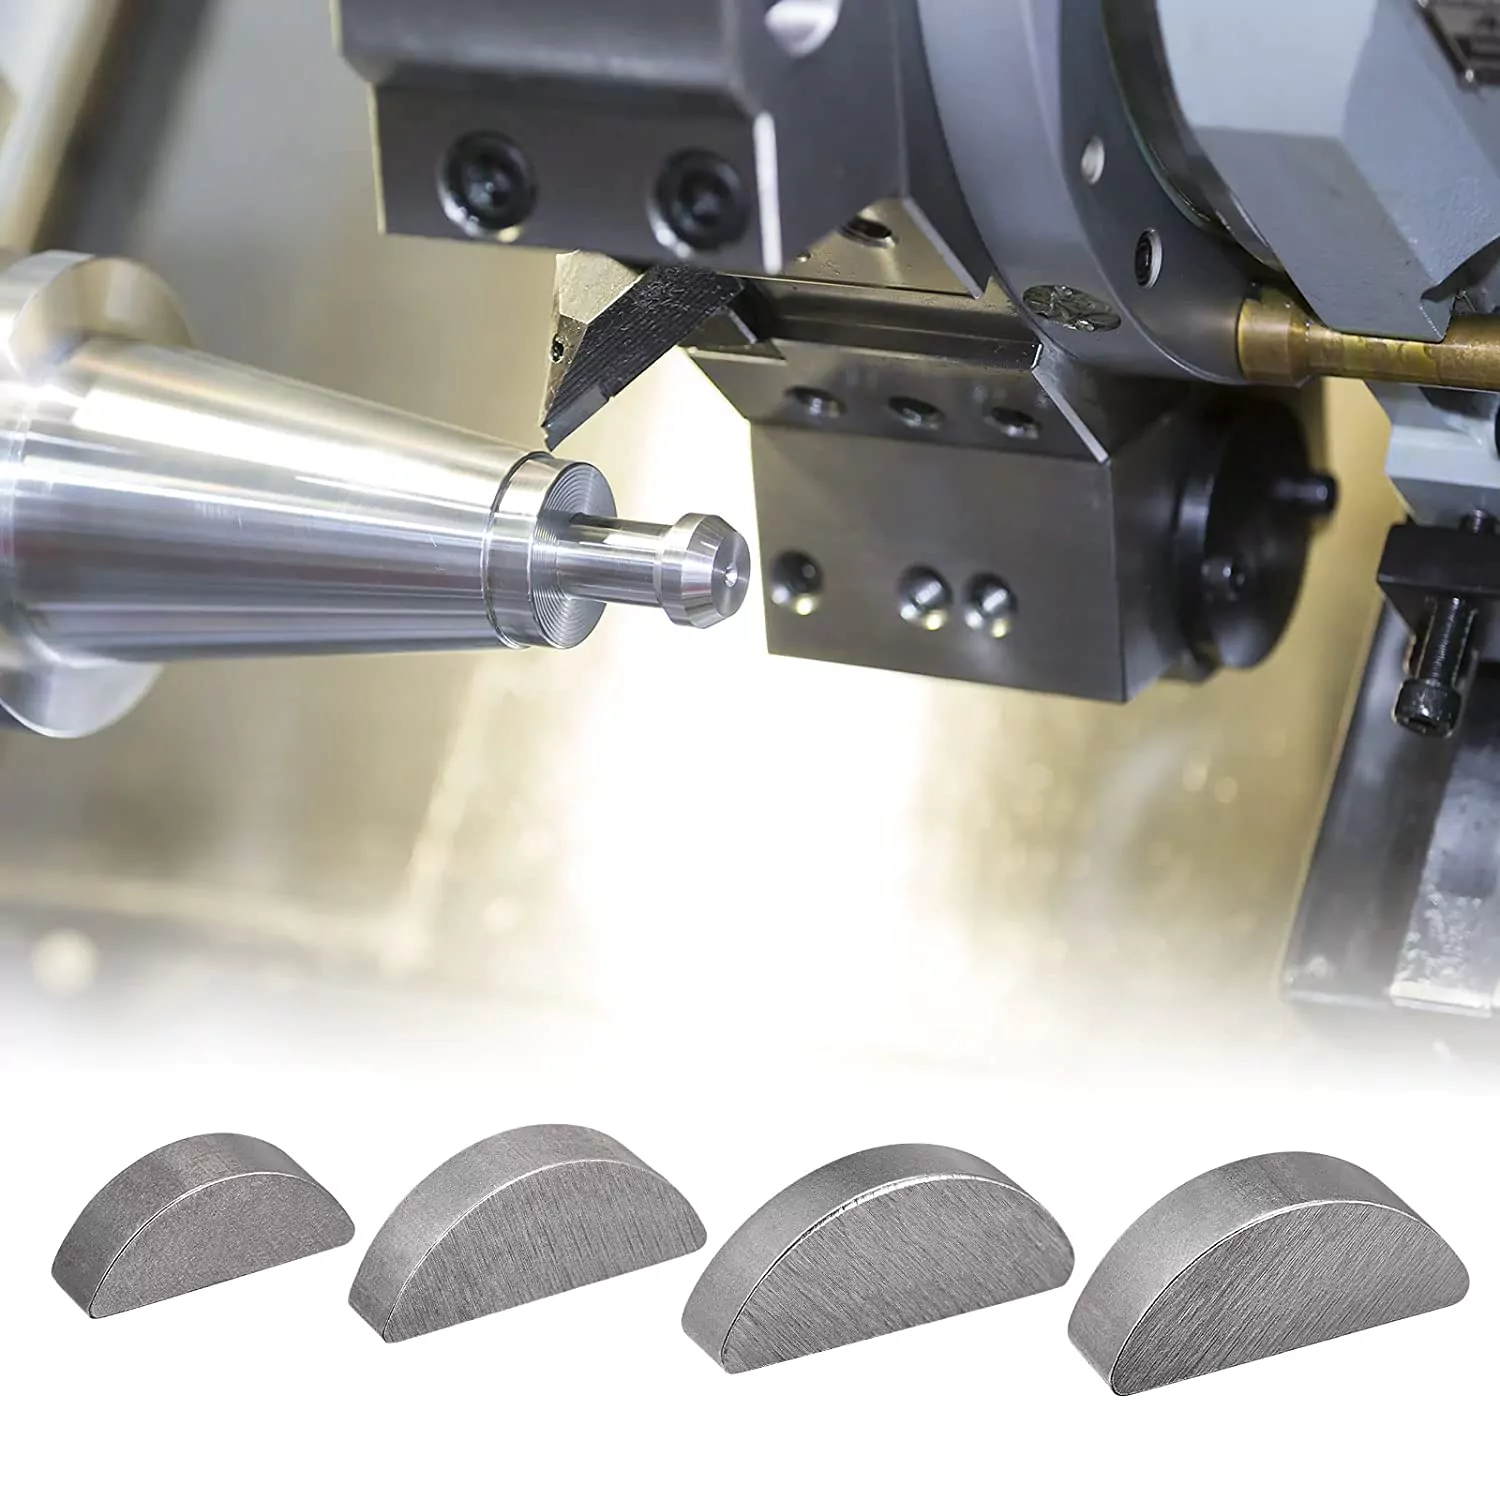
Identify the Woodruff Key
The first step in removing a woodruff key is to identify its location. Woodruff keys are typically found on the end of a shaft or on a pulley or gear that is mounted on the shaft. Look for a small, semi-circular piece of metal that is inserted into a groove cut into the shaft. If you can’t locate the key, consult the owner’s manual or parts diagram for your machinery.
2 Gather Your Tools
Once you’ve located the woodruff key, you’ll need a few tools to remove it. Here’s what you’ll need:
- Needle-nose pliers or a small pry bar
- A small hammer or mallet
- A flathead screwdriver
- A pair of safety glasses
- Penetrating oil (optional)
Remove Any Obstructions
Before you can remove the woodruff key, you may need to remove any obstructions that are blocking access to it. This could include pulleys, gears, or other components that are mounted on the shaft. Use a wrench or socket set to remove any bolts or fasteners that are holding these components in place, and set them aside.
Lubricate the Keyway
If the woodruff key is stuck in the shaft, you may need to lubricate the keyway to loosen it up. Apply a few drops of penetrating oil to the keyway, and let it sit for a few minutes. This will help to break up any rust or corrosion that may be holding the key in place.
Remove the Woodruff Key
Once the keyway is lubricated, it’s time to remove the woodruff key. Here’s how to do it:
Use a flathead screwdriver to gently pry the woodruff key out of the keyway. Be careful not to damage the keyway or the key itself.
If the key won’t budge, use a pair of needle-nose pliers or a small pry bar to wiggle it loose. Be gentle, and work the key back and forth until it starts to move.
Once the key is loose, use a small hammer or mallet to tap it out of the keyway. Tap the key lightly from side to side to work it out of the keyway.
Inspect the Keyway and Key
Once the woodruff key is removed, inspect both the keyway and the key itself for any signs of damage or wear. If the keyway is damaged, it may need to be repaired or replaced before you can install a new woodruff key. Similarly, if the woodruff key is damaged or worn out, you’ll need to replace it with a new one.
Install a New Woodruff Key
To install a new woodruff key, simply slide it into the keyway and align it with the mating slot in the component that will be mounted on the shaft. Make sure the key is fully seated in the keyway and that it is flush with the surface of the shaft.
Reassemble the Components
Once you have removed the old woodruff key and inspected both the keyway and key, it’s time to reassemble the components. Here’s how to do it:
- If you had to remove any components to access the woodruff key, reattach them using the same bolts or fasteners you removed earlier.
- Place the component that will be mounted on the shaft back onto the shaft, making sure to align the mating slot with the woodruff key.
- Gently tap the component into place using a small hammer or mallet. Make sure it is seated securely onto the shaft and that the key is properly aligned.
- Reattach any bolts or fasteners that hold the component in place, tightening them to the manufacturer’s recommended torque specifications.
Tips for Removing a Stuck Woodruff Key
If the woodruff key is stuck in the shaft and won’t budge, there are a few additional techniques you can try to remove it. Here are some tips:
- Apply heat: Use a heat gun or propane torch to heat up the area around the keyway. This can help to expand the metal and loosen the key. Be careful not to overheat the shaft or surrounding components, as this can cause damage.
- Use a puller: If the woodruff key is really stuck, you may need to use a puller to remove it. A puller is a tool that uses mechanical force to pull the key out of the keyway. You can rent a puller from a hardware store or auto parts store.
- Tap it out: Use a punch or drift to tap the key out of the keyway. Place the punch or drift against the edge of the key and tap it lightly with a hammer. Work the key back and forth until it starts to move, then use pliers or a pry bar to wiggle it loose.
3 Safety Considerations
When removing a woodruff key, it’s important to take some safety precautions to avoid injury. Here are some safety tips to keep in mind:
- Wear safety glasses to protect your eyes from flying debris or metal chips.
- Make sure the machinery is turned off and unplugged before you start working on it.
- Use caution when using tools such as hammers and pry bars to avoid damaging the shaft or surrounding components.
- Be aware of your surroundings and make sure no one is standing in the line of fire if the key suddenly pops out of the keyway.
4 Wrapping Up
By following the step-by-step instructions provided in this blog, you can remove a woodruff key safely and effectively, regardless of the type of machinery you are working on.
Moreover, inspecting the keyway and key itself for any damage or wear is a crucial part of the process. By doing so, you can ensure that the new woodruff key is properly installed and will function correctly, reducing the risk of equipment failure or other issues down the line. With a little patience and care, you can install a new woodruff key and have your machinery running smoothly once again.
However, it’s important to remember that safety should always come first when working with machinery. Always wear safety glasses, turn off the machinery, and take your time to avoid damaging any components or injuring yourself. By following these safety precautions and the steps outlined in this blog, you can remove a woodruff key with confidence and get your machinery back up and running in no time.
Also, check out our blog on the versatility of wall brackets and find out about types of wall brackets and how to install them.
Community Q&A
About This Article

This article has been viewed 607 times.

Featured Articles
 How to Hide Reels on Instagram? An Ultimate Guide
 How to Add Stop in Ola? A Step-by-Step Guide