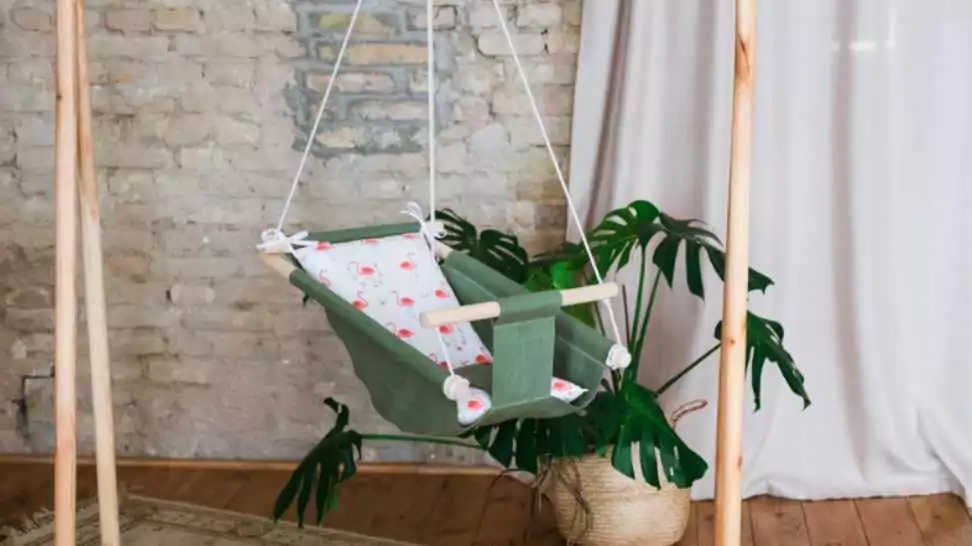
How To Make A Baby Swing At Home?

Installing a baby swing in your home opens up a world of joy and cherished moments with your little one. It’s more than just a soothing retreat for your baby; it provides a precious hands-free pause for busy parents too.
In this blog, we’ll take you through the rewarding process of how to make a baby swing in your space. We’ve got you covered from picking the right materials to the final safety check. This guide is perfect for both experienced DIYers and beginners eager to embark on a meaningful project. Let’s dive into making a special swing that will fill your baby’s days with laughter and comfort, always prioritizing safety at every step.
1 Materials and Tools Needed
Creating a baby swing at home is a fulfilling project, but it’s crucial to begin with the right materials and tools. This section will guide you through selecting high-quality, safe materials and the essential tools you will need.
Materials Required for Making a Baby Swing
- Swing Seat: Choose a soft, durable fabric that’s comfortable against your baby’s skin. Natural fibres like cotton or a sturdy canvas are ideal.
- Ropes: Opt for strong, weather-resistant ropes like nylon or polyester. Ensure they are thick enough to bear weight securely.
- Wooden Dowel or Bar: This will act as the swing’s support bar. A smooth, rounded wooden dowel or a sturdy metal bar works well.
- Cushioning: For added comfort, select a soft padding material that can be covered with the same or coordinating fabric.
- Fasteners: Durable, baby-safe fasteners such as heavy-duty sewing thread, clasps, or carabiners for attaching the swing to its support.
Essential Tools and Safety Equipment
- Sewing Machine or Sewing Kit: For assembling fabric components.
- Drill: If you’re using a wooden dowel, you’ll need a drill to make holes for the rope.
- Measuring Tape: Precision is key for both safety and comfort.
- Scissors: For cutting fabric and rope.
- Safety Gear: Gloves and safety glasses are recommended when drilling or cutting.
Safety Equipment for Installation
- Stud Finder: To securely locate a beam in your ceiling for indoor swings.
- Level: Ensure the swing hangs evenly.
- Ceiling Hooks: Heavy-duty, secure hooks for supporting the swing’s weight.
Tips for Choosing Quality and Safe Materials
- Prioritize Non-toxic Materials: Especially for fabrics and ropes, ensure they are free from harmful chemicals.
- Strength is Key: Choose materials that can comfortably support your baby’s weight. Check the weight limitations for all components.
- Comfort Matters: Select soft, breathable fabrics for the swing seat to ensure your baby’s comfort.
- Durability: Opt for weather-resistant materials if you plan to use the swing outdoors.

2 Designing Your Baby Swing
Designing a baby swing is not just about aesthetics; it’s about combining functionality, safety, and comfort. In this section, we’ll explore various types of baby swings and emphasize the importance of an ergonomic design. Plus, we’ll walk you through sketching your basic design.
Different Types of Baby Swings
- Traditional Baby Swing: These swings usually feature a simple, time-honoured design. Often made of wood and soft fabric, they blend well with natural outdoor environments.
- Modern Baby Swing: Modern designs can include more contemporary materials like lightweight metals or synthetics. They often boast compact and portable designs, suitable for both indoor and outdoor use.
- Portable Baby Swing: Ideal for families on the go, these swings are lightweight, foldable, and easy to transport. They are generally less sturdy than permanent swings but offer great flexibility.
Importance of Ergonomic Design
An ergonomic design is crucial for your baby’s comfort and safety. A well-designed swing cradles the baby gently, supports their back, and prevents them from slumping. The seat should be deep enough to hold the baby securely while allowing room for growth. Also, consider the swing’s movement – it should be smooth and soothing, not jerky or abrupt.
Step-by-Step Guide to Sketching a Basic Design
- Start with Research: Look at various designs online for inspiration. Notice the shapes, sizes, and materials used.
- Decide on the Type: Based on your preference and needs (indoor, outdoor, portable), decide on the type of swing you want to make.
- Sketch the Frame: Draw the side and top views. If you’re making a traditional or modern swing, consider a sturdy frame that can be hung. For a portable swing, think about a foldable design.
- Design the Seat: Focus on the ergonomics. The seat should be slightly reclined to prevent the baby from falling forward. Ensure it’s deep and wide enough for your baby.
- Add Safety Features: Sketch where the safety belts will go. They should be adjustable and secure.
- Plan for Comfort: Draw where the padding will be added. Consider a padded backrest and sides for extra comfort and support.
- Consider the Hanging Mechanism: If it’s a hanging swing, decide how you’ll attach it to the frame or ceiling. Ensure this part of the design is particularly strong and secure.
- Finalize Your Design: Review your sketch, make adjustments as needed, and ensure all safety and comfort elements are included.
3 Building the Baby Swing
With a well-thought-out design in hand, it’s time to bring your baby swing to life. This section provides detailed instructions for cutting, assembling parts, sewing a comfortable seat, and making the swing adjustable for your growing baby.
Cutting and Assembling Parts
1. Prepare the Frame:
- If using a wooden dowel, cut it to the desired length, typically around 24 to 30 inches.
- Smooth the ends with sandpaper to prevent splinters.
2. Cut the Fabric:
- Based on your design, cut the fabric for the seat. Leave extra material on each side for seams and attachments.
3. Attach the Ropes:
- Drill holes through the dowel at equal distances from each end.
- Thread the rope through the holes, ensuring it’s evenly balanced.
- Secure the rope with strong knots underneath the dowel.
Sewing the Seat
1. Prepare the Fabric:
- Fold the edges to create a hem and sew for a neat finish.
- If you’re adding padding, cut it to size and place it between the fabric layers.
2. Create Attachments:
- Sew loops or pockets at the corners/top edges of the fabric to attach it to the dowel or frame.
- Ensure these attachments are robust and securely sewn.
3. Add Safety Harness:
- Sew a safety harness in the middle of the seat. Use durable material and ensure it’s comfortably padded.
Making the Swing Adjustable
1. Adjustable Seat Depth:
- Add buttons or Velcro straps along the sides of the seat. This allows you to adjust the seat’s depth as your baby grows.
2. Adjustable Rope Length:
- Use adjustable knots or install carabiners at the end of the ropes. This will enable you to change the height of the swing easily.
3. Removable Padding:
- Design the seat padding to be removable. This way, you can add or remove layers according to your baby’s size.
Tips for Building the Swing
- Always Double-Check Measurements: Precision ensures safety and comfort.
- Quality Over Quantity: Don’t compromise on material quality. It’s better to invest in strong, durable components.
- Regular Inspection: After assembly, regularly check every part of the swing for any wear or damage.

4 How to Install the Baby Swing at Home?
Installing your homemade baby swing is a critical step. It’s essential to ensure that the installation is as safe as the swing itself. This section covers choosing a safe location, installation instructions for both indoor and outdoor settings, and testing for stability and safety.
Pre-Installation: Choosing a Safe and Suitable Location
1. Indoor Installation:
- Select a location away from walls and furniture to avoid collisions.
- Ensure the ceiling is structurally sound. Use a stud finder to locate a ceiling joist for secure attachment.
2. Outdoor Installation:
- Choose a spot that’s free from hazards like rocks or sharp objects.
- Avoid direct sunlight to prevent fabric fading and overheating.
3. Consider Space Around the Swing:
- Ensure there’s ample room for the swing to move freely.
Step-by-Step Instructions for Installation
Indoor Installation:
- Locate a Ceiling Joist: Use a stud finder to find a solid joist.
- Install the Eye Hook: Drill a pilot hole into the joist, then screw in a heavy-duty eye hook.
- Attach the Swing: Use carabiners or a secure knot to attach the swing ropes to the eye hook. Ensure it hangs at the right height.
Outdoor Installation:
- Choose a Sturdy Support: This could be a strong tree branch or a beam on your porch.
- Install the Swing: If using a tree, loop the rope over the branch and secure it with strong knots. For a beam, you might need to install an eye hook as with indoor installation.
How to Test the Swing for Stability and Safety?
1. Weight Test:
Before letting your baby use the swing, test it with a weight similar to your baby’s. This can be done using bags of sand or similar.
2. Check for Secure Fittings:
Ensure all knots, clasps, and fasteners are secure. There should be no fraying ropes or loose threads.
3. Inspect Movement:
Gently push the swing to check for smooth and even movement. There should be no creaking sounds or signs of strain on the support.
4. Regular Maintenance:
Regularly inspect the swing, especially the attachment points, for wear and tear.

5 Safety Precautions and Maintenance
The safety and longevity of your homemade baby swing depend significantly on how it is used and maintained. This section will outline key safety guidelines, routine checks, maintenance tips, and advice on recognizing when it’s time to retire the swing.
Guidelines for Safe Usage of the Baby Swing
1. Supervision:
Always supervise your baby while they are in the swing. Never leave them unattended.
2. Age and Weight Limit:
Adhere to the age and weight specifications based on your swing’s design and materials. Generally, baby swings are suitable for infants from a few months old until they can sit up unaided.
3. Gentle Motion:
Swing your baby with a gentle, soothing motion. Avoid aggressive swinging as it can be dangerous.
4. Secure Your Baby:
Always use the safety harness and ensure your baby is snugly and comfortably secured.
Routine Checks and Maintenance Tips
1. Regular Inspection:
Check the swing before each use for any signs of wear or damage, especially in the ropes, fabric, and attachment points.
2. Weathering and Wear:
If the swing is outdoors, be aware of weathering effects. Sun can fade and weaken fabrics, while rain can affect wood and metal parts.
3. Cleaning:
Clean the fabric regularly according to the material specifications. Wipe down the frame and other non-fabric parts to keep them free of dirt and moisture.
4. Tighten and Secure:
Periodically check and tighten any bolts or knots. Ensure carabiners or hooks are secure and free of rust.
When to Retire the Swing: Recognizing Signs of Wear and Tear
1. Fabric Wear:
Look for tears, thinning, or severe fading in the fabric. These can compromise the swing’s safety.
2. Rope Condition:
Check for fraying, unravelling, or stiffness in the ropes. Replace them if they show significant wear.
3. Structural Integrity:
Inspect the frame for cracks, splits, or bending. In the case of wooden swings, check for rot or insect damage.
4. Stability Issues:
If the swing starts to feel unstable or makes unusual noises during use, it’s time to investigate and possibly retire it.
6 Wrapping Up
In summarising our guide to crafting and installing a baby swing at home, we’ve journeyed from selecting quality materials to designing, assembling, and customising a cosy swing. Each step is crucial in ensuring a safe and enjoyable space for your little one. This DIY project goes beyond mere functionality; it’s a labour of love, creating a unique and memorable part of your baby’s life.
While embracing creativity, remember the utmost importance of safety and regular maintenance for your baby’s well-being. Making a baby swing at home is a fulfilling mix of DIY passion and parental care, offering a special, safe haven for your child. So, grab your tools, let your creativity flow, and start this rewarding project to build a swing your baby will cherish.
Community Q&A
About This Article
This article has been viewed 137 times.


