How to Assemble A Baby Tricycle At Home?
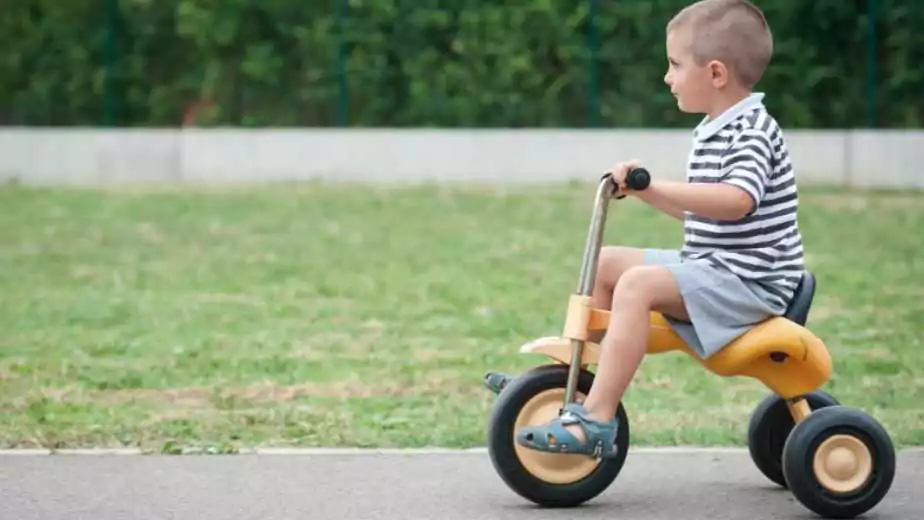
Welcoming a baby tricycle into your home is more than just adding a toy to your child’s collection. It’s about encouraging their sense of adventure, fostering independence, and aiding in their overall development. Baby tricycles are not just tools for fun; they play a pivotal role in enhancing motor skills, balance, and coordination in young children. This makes choosing and assembling the right tricycle an important task for parents and guardians.
In this guide, we will focus on the crucial aspect often overlooked – how to assemble a baby tricycle. While the process might seem daunting at first, with the right steps and guidance, it can be an enjoyable and fulfilling experience. Assembling a tricycle is not just about following instructions; it’s about ensuring safety, and stability, and creating a dependable tool for your child’s developmental journey. Let’s embark on this step-by-step journey to successfully assemble a baby tricycle, ensuring your little one’s first rides are safe, comfortable, and full of joy.
1 Pre-Assembly Preparation
Unboxing the Tricycle
Unboxing your baby tricycle is the first step in this exciting journey. It’s essential to do this safely and methodically to ensure no parts are lost or damaged. Begin by carefully opening the box with a pair of scissors or a box cutter, being mindful not to damage the contents inside. Lay out all the parts on a clean, flat surface, such as a rug or a soft cloth, to prevent any scratches. This is also a good time to cross-reference the parts with the instruction manual to ensure everything is accounted for.
Organizing the parts can significantly simplify the assembly process. Group similar items together — wheels, screws, and body parts. This not only helps in easy identification during assembly but also ensures you’re aware of any missing or extra parts.
Tools and Materials Needed
Before you begin assembling, gather all the necessary tools and materials. Typically, you will need:
- Screwdrivers: A set of flathead and Phillips screwdrivers of various sizes.
- Wrenches: Adjustable wrenches or a set of open-end or socket wrenches, depending on the tricycle model.
- Allen keys: Some tricycles require Allen keys for specific bolts or screws.
In addition to these tools, prioritize safety:
- Gloves: Wear a pair of sturdy gloves to protect your hands from sharp edges and provide a better grip.
- Safety Goggles: These are crucial, especially when dealing with small, springy parts that could accidentally fly up.
2 Understanding the Parts
Identifying Each Part
Before diving into the assembly, it’s crucial to familiarize yourself with each component of the tricycle. Here’s a brief overview:
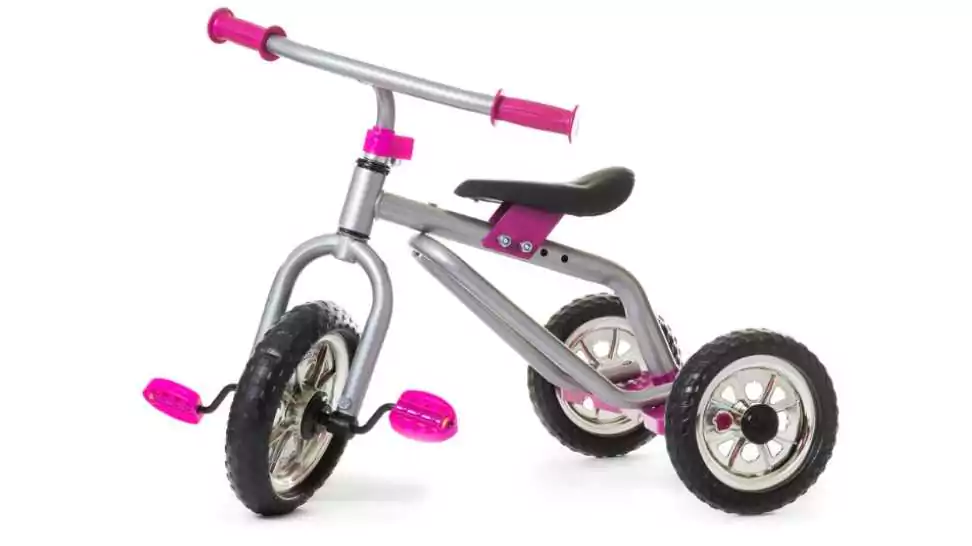
- Frame: This is the core structure of the tricycle, to which all other parts are attached. It’s usually made of metal or sturdy plastic.
- Wheels: There are typically three wheels – one at the front and two at the back. Check for the front wheel’s steering mechanism and the durability of the tires.
- Seat: Ensure the seat is comfortable and adjustable. Some tricycles come with a backrest for added support.
- Handlebars: These are crucial for steering. They should be ergonomically designed for little hands and often come with grips or decorations.
- Pedals: Usually attached to the front wheel, these should be well-sized for small feet and have a non-slip surface.
It’s beneficial to lay out these parts and visually match them with their images in the instruction manual. This not only helps in understanding their function but also in ensuring correct assembly.
Importance of the Instruction Manual
The instruction manual is your roadmap to a successful assembly. It contains specific details and procedures tailored to your tricycle model. Here’s why it’s essential:
- Step-by-Step Guide: The manual provides sequential steps, making the assembly process manageable and less overwhelming.
- Safety Precautions: It outlines critical safety warnings and tips to ensure the tricycle is assembled correctly and safely.
- Troubleshooting: Manuals often include troubleshooting sections to help you resolve common issues that might arise during assembly.
Throughout the assembly process, keep the manual close at hand. Refer to it at each step to confirm you’re on the right track. Remember, the goal is not just to assemble the tricycle but to ensure it’s safe and enjoyable for your child to ride.
3 Step-by-Step Assembly Guide
1. Attaching the Rear Wheels
- Position the Rear Axle: Locate the rear axle and align it with the frame’s designated slots.
- Attach the Wheels: Slide the rear wheels onto the axle. Ensure they face the correct direction as per the manual.
- Secure with Washers and Nuts: Place washers on the axle before screwing the nuts. Tighten the nuts using a wrench but ensure the wheels still spin freely.
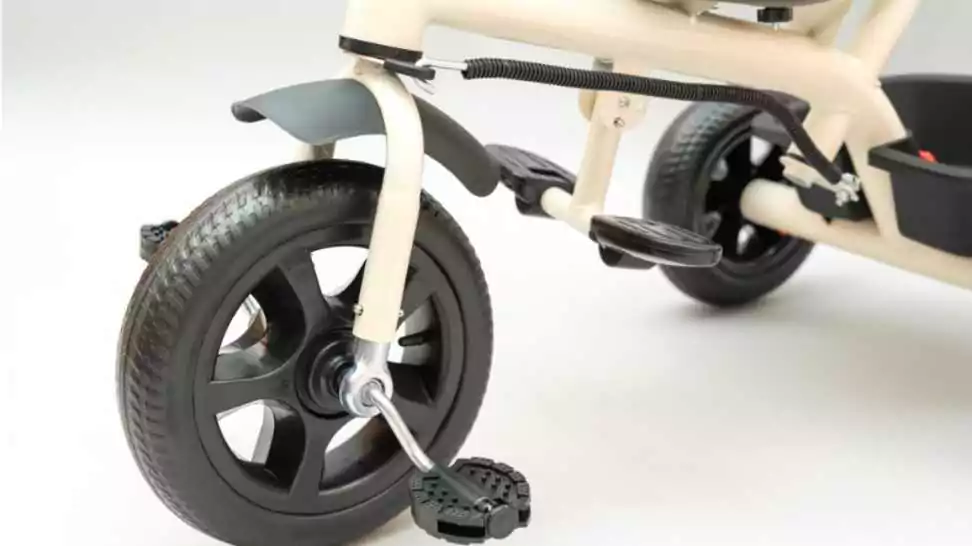
Assembling the Front Wheel and Fork
- Insert the Fork: Slide the fork into the front part of the frame.
- Attach the Front Wheel: Position the front wheel between the forks. Insert the axle through the wheel hub and the fork holes.
- Secure the Wheel: Fasten the axle with washers and nuts. Double-check the alignment to ensure smooth steering.
Fitting the Seat and Handlebars
- Attach the Seat: Insert the seat post into the frame. Adjust to the desired height and secure it with the clamp or bolt.
- Install the Handlebars: Slide the handlebars into the top of the fork. Ensure they are aligned with the front wheel before tightening.
Installing the Pedals
- Identify Left and Right Pedals: Note that pedals are often site-specific.
- Attach the Pedals: Screw the pedals into the crank arms. Remember, the left pedal is reverse-threaded.
- Tighten Securely: Use a wrench to ensure the pedals are tightly secured but do not over-tighten.
Final Checks and Adjustments
- Inspect All Bolts and Nuts: Go over every bolt and nut to ensure everything is tight and secure.
- Test the Tricycle: Gently roll the tricycle to check wheel alignment and ease of pedalling.
- Adjust for Comfort: Make final seat and handlebar adjustments for your child’s comfort and ease of use.
- Safety Check: Before letting your child ride, perform a safety check, ensuring the tricycle is stable and all parts are properly installed.

4 Safety and Maintenance
Safety Checks Post-Assembly
After assembling the tricycle, it’s crucial to conduct thorough safety checks:
- Wheels: Ensure all wheels are securely attached and spin freely without wobbling.
- Brakes (if applicable): Test the brakes to ensure they engage properly and are not too tight or loose.
- Seat: Check that the seat is stable and securely fastened at the correct height.
- Handlebars: Verify that the handlebars are tightly secured and aligned with the front wheel for accurate steering.
- Pedals: Make sure the pedals are tightly screwed in and rotate smoothly.
- Screws and Bolts: Double-check all screws and bolts to ensure they are tightened correctly.
- General Structure: Inspect the tricycle for any sharp edges, loose parts, or anything that might pose a risk.
Regular Maintenance Tips
To ensure the tricycle remains safe and lasts long, regular maintenance is key:
- Regular Cleaning: Wipe down the tricycle regularly to keep it free from dirt and grime.
- Tighten Loose Parts: Periodically check and tighten any loose screws, bolts, or nuts.
- Wheel Care: Check the wheels for wear and tear. Inflate tires if they are pneumatic.
- Lubrication: Lubricate moving parts, such as the wheel axles and pedal joints, to ensure smooth operation.
- Storage: Store the tricycle in a dry place to prevent rust and weather damage.
- Safety Gear: Always ensure your child wears appropriate safety gear like helmets, knee pads, and elbow pads while riding.

5 Wrapping Up
Assembling a baby tricycle is a fulfilling task that contributes to your child’s fun and safety. We’ve covered everything from unboxing to the final assembly, including attaching wheels, fitting the seat and handlebars, and installing pedals. Remember, post-assembly safety checks and ongoing maintenance are key to ensuring a safe ride.
Watching your child enjoy their first ride on the tricycle you assembled is rewarding. Prioritize safety, use helmets, and keep an eye on their initial rides.
Cherish these moments and the adventures that await on three wheels!
Community Q&A
About This Article

This article has been viewed 128 times.