
How To Clean Kitchen Exhaust Fan Step by Step?
Having a clean, fresh, and hygienic kitchen is the cornerstone of any household. But, while you might be diligent about wiping down the counters or scrubbing your oven, there’s one important feature that often gets overlooked – the kitchen exhaust fan. This underrated appliance helps to keep your kitchen free of cooking smells, smoke, and even potentially harmful pollutants, but its maintenance can often be forgotten in the bustle of daily life. In this comprehensive guide, we’re going to explore how to clean kitchen exhaust fan, ensuring it works efficiently and keeps your kitchen air fresh.
1 Why Cleaning Your Kitchen Exhaust Fan is Important?
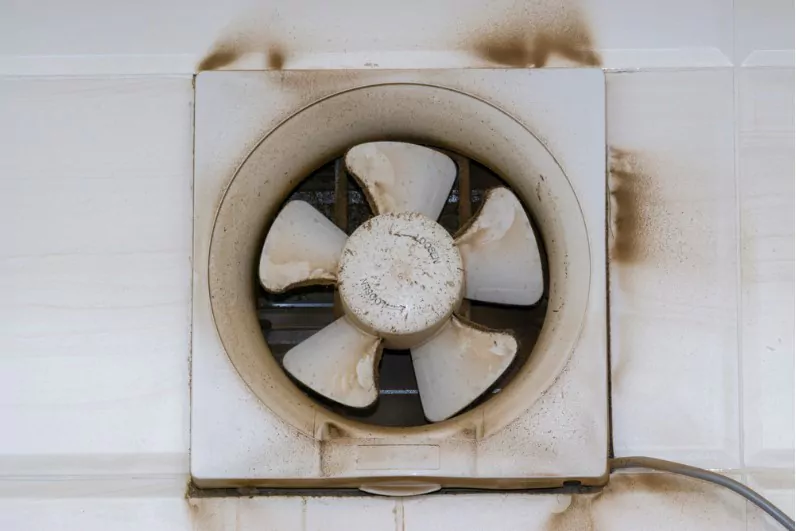
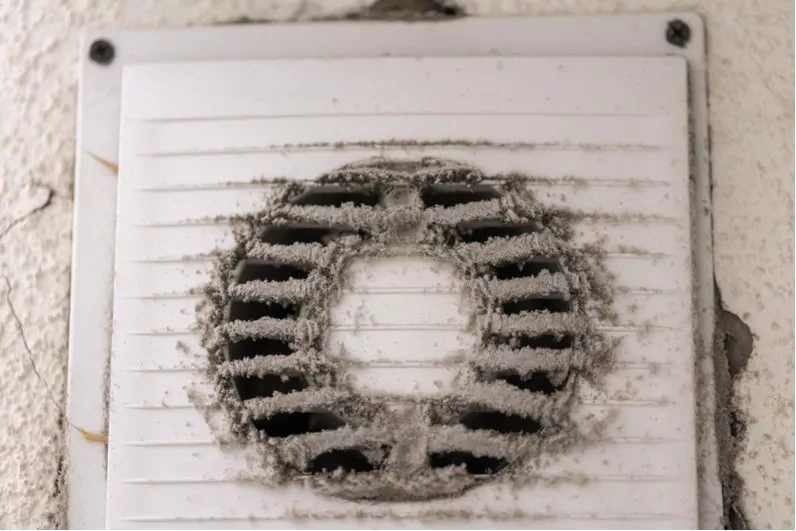
Before we delve into the details of how to clean kitchen exhaust fan, it’s important to understand why it’s crucial. As you cook, your exhaust fan absorbs airborne grease particles, smoke, and other impurities, which gradually build up over time. This can lead to a decrease in efficiency, unpleasant odours, and even pose a potential fire hazard. By cleaning your kitchen exhaust fan regularly, you can ensure it continues to function optimally, prolong its lifespan, and keep your kitchen air clean.
2 How Often Should You Clean Your Kitchen Exhaust Fan?
There’s no one-size-fits-all answer to this question. The frequency of cleaning your kitchen exhaust fan will depend on how often you cook and the types of meals you prepare. If you cook frequently and your meals often involve frying or grilling, you’ll need to clean your kitchen exhaust fan more often. As a general rule, aim to give your exhaust fan a thorough cleaning every 3-6 months.
3 Step By Step Process to Clean Exhaust Fans
Before we delve into the nitty-gritty of how to clean kitchen exhaust fan, there are a few preparatory steps to take:
- Safety First: Ensure the exhaust fan is switched off and unplugged from the power source to prevent any electrical accidents.
- Gather Your Cleaning Supplies: You’ll need a bucket, warm water, dish soap, a scrub brush or sponge, a screwdriver (to disassemble the fan), and microfiber cloths for drying.
- Prepare Your Work Area: Lay down old sheets or newspapers around your work area to catch any dripping water or debris from the cleaning process.
4 How to Clean Kitchen Exhaust Fan: A Step-by-step Guide
Now that you’re all set let’s dive into the main process of how to clean kitchen exhaust fan:
Step 1: Disassembling the Exhaust Fan
Using your screwdriver, carefully disassemble the exhaust fan. This typically involves removing the filter and any other detachable parts. Make sure to keep track of all screws and small parts and remember their original positions to aid in reassembly.
Step 2: Soak the Filter
The filter is the part of the exhaust fan that traps most of the grease and grime. Fill your bucket with warm water and add a generous amount of dish soap. Submerge the filter in this soapy solution and let it soak for about an hour. This will help to loosen up the grease and grime.
Step 3: Clean the Fan and Housing
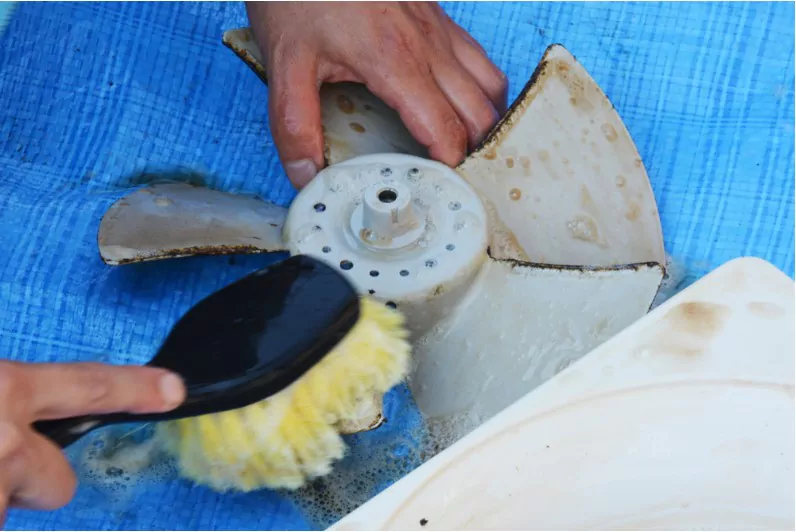
After soaking, the grease on the filter should be loosened and easier to remove. Use a scrub brush or an old toothbrush to scrub away the grease and grime from the filter. Pay special attention to areas that are still visibly dirty. Once you’ve scrubbed off the debris, rinse the filter thoroughly under warm running water.
Step 5: Dry and Reassemble
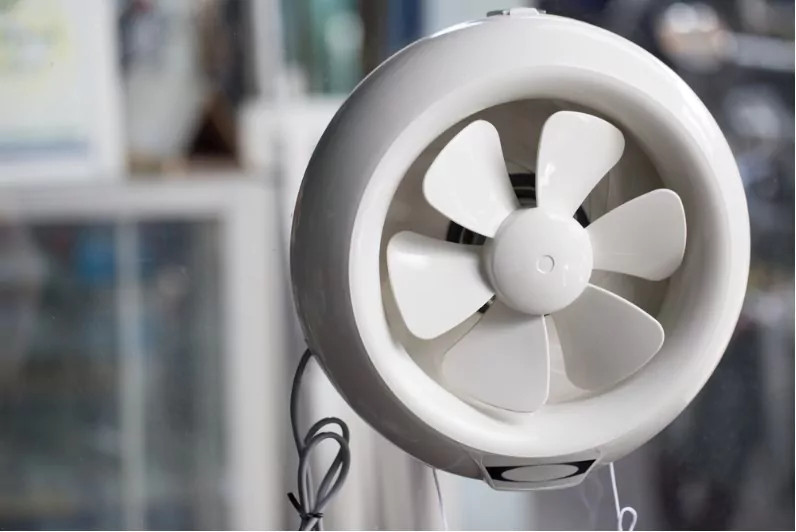
After all parts of your kitchen exhaust fan have been thoroughly cleaned, it’s time to dry them. Use a clean, dry microfiber cloth to wipe down the fan and housing. Allow the filter to air dry completely, as any remaining moisture can attract more dust and lead to the growth of mould or mildew.
Once everything is fully dried, reassemble your kitchen exhaust fan, making sure to place all screws and parts back in their original positions.
5 Tips for Maintaining a Clean Kitchen Exhaust Fan
Now that we’ve gone through the process of how to clean kitchen exhaust fan, let’s look at some tips to maintain it and prolong the time between deep cleanings:
Regular Light Cleaning: Rather than waiting for grime to build up, regularly wipe down the exterior of your exhaust fan with a damp cloth. This helps prevent a heavy buildup of dust and grease.
Change Filters Regularly: If your kitchen exhaust fan uses replaceable filters, make sure to change them as recommended by the manufacturer.
Avoid Excessive Smoke and Grease: Try to minimise the amount of smoke and grease produced while cooking. Use lids on pots and pans to limit the amount of smoke and grease particles released into the air.
Ventilate Your Kitchen: Whenever possible, open windows or doors to allow fresh air into your kitchen. This helps to dilute and disperse smoke, cooking odours, and airborne grease particles.
6 Wrapping Up
In conclusion, knowing how to clean kitchen exhaust fan is essential for any homeowner or renter. A clean exhaust fan operates more efficiently, reduces unpleasant cooking odours, and helps to maintain the overall cleanliness of your kitchen. While the process may seem daunting, with the right tools and a bit of time, it’s actually a simple and straightforward task. So, roll up your sleeves, gather your cleaning supplies, and give your kitchen exhaust fan the cleaning it deserves.
Remember, a clean and best kitchen exhaust fan not only enhances the quality of your indoor air but also provides a safer and more pleasant environment for cooking. Let this guide serve as your comprehensive manual on how to clean kitchen exhaust fan, promoting a healthier, cleaner, and happier kitchen for you and your loved ones.
Community Q&A
About This Article

This article has been viewed 459 times.

Featured Articles
 Best Dishwasher Detergents to Buy in India: Top Picks for Sparkling Clean Dishes
 Best Dishwashing Gloves to Buy for Less Than 300