How To Make A Baby Carrier From Scratch?
Welcoming a new baby is a remarkable journey filled with love and care. One of the ways to enhance this bonding experience is through a custom-made DIY baby carrier, perfectly tailored to your baby’s needs and your style.
In this blog, we’ll explore how to make a baby carrier, the benefits of using a baby carrier, not just for convenience, but as a way to strengthen the bond with your child. We emphasize the importance of safety and comfort, ensuring every detail, from the choice of fabric to the carrier’s design, prioritizes your baby’s well-being.
Join us as we guide you through creating a baby carrier that’s not only safe and cozy but also a reflection of your unique style. We’ll cover everything from selecting suitable materials to ergonomic designs that support your baby’s growth.
Get ready for a fulfilling DIY journey that combines the beauty of craftsmanship with the joys of parenthood.
1 Understanding Different Types of Baby Carriers
As a new or expecting parent, choosing the right baby carrier can seem like navigating a maze of endless options. Each type offers unique benefits and is suitable for different stages of your baby’s growth. Let’s explore three popular types of baby carriers: the Wrap, the Mei Tai, and the Structured Carrier, to help you make an informed decision for your DIY project.
Wrap
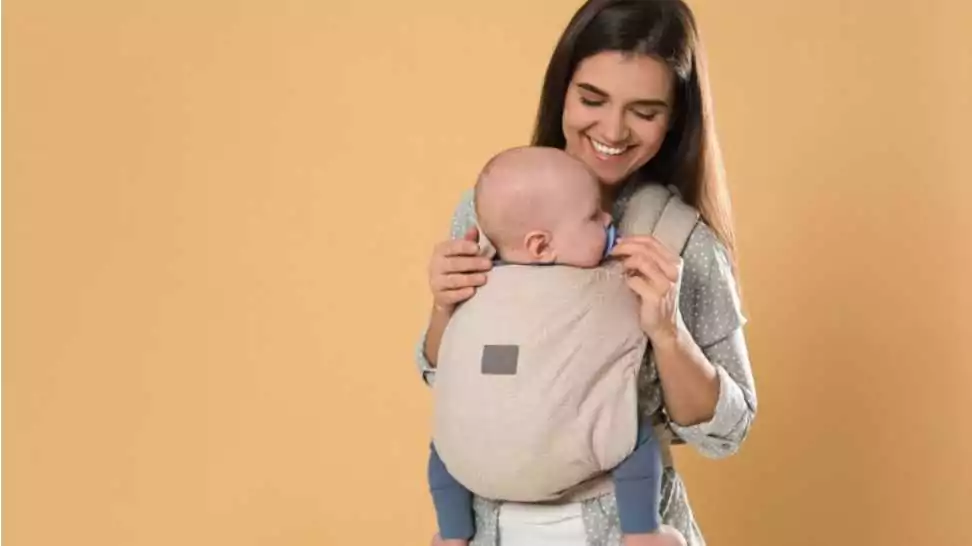
A wrap is a long piece of fabric that you tie around your body and your baby. It’s incredibly versatile, allowing for various tying methods to suit your baby’s age and your comfort. The wrap offers a snug, womb-like environment, perfect for newborns and infants. It distributes weight evenly across your back and shoulders, minimising discomfort during prolonged use.
Wraps are ideal for newborns and younger infants who need close body contact and support. The snug fit provides a sense of security, simulating the feeling of being in the womb, which can be soothing for young babies. It’s also a great choice for parents who want a carrier that adjusts as their baby grows.
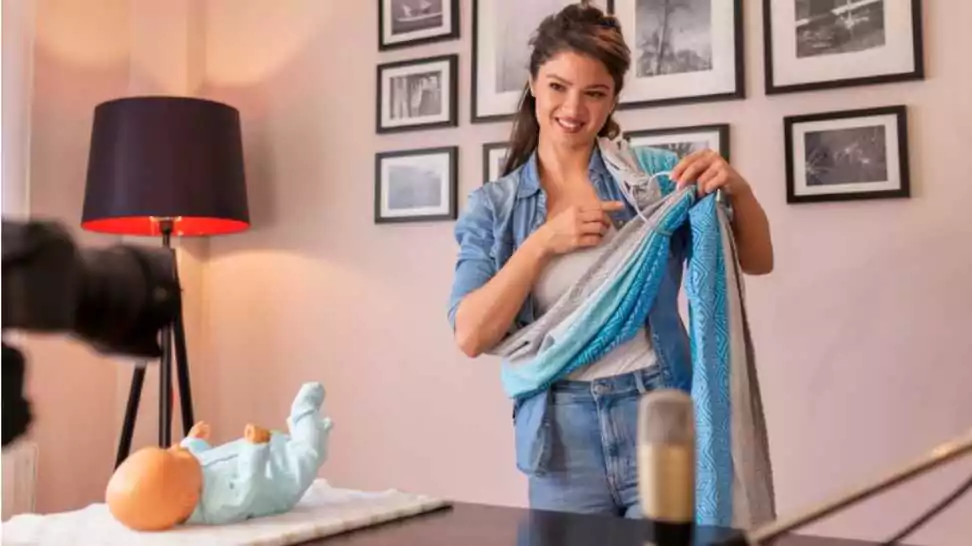
Mei Tai
The Mei Tai is a traditional Asian carrier that combines the simplicity of a wrap with the support of a structured carrier. It typically consists of a square or rectangular cloth with four straps that you tie around your waist and shoulders. Mei Tais are known for their ease of use and adjustability, providing a custom fit for both the baby and the wearer.
This carrier is perfect for infants and toddlers alike. Its versatility makes it suitable for front, back, and hip carrying, adapting to your growing child’s needs. The Mei Tai is ideal for parents who prefer a carrier that is easy to put on and adjust but offers more structure than a wrap.
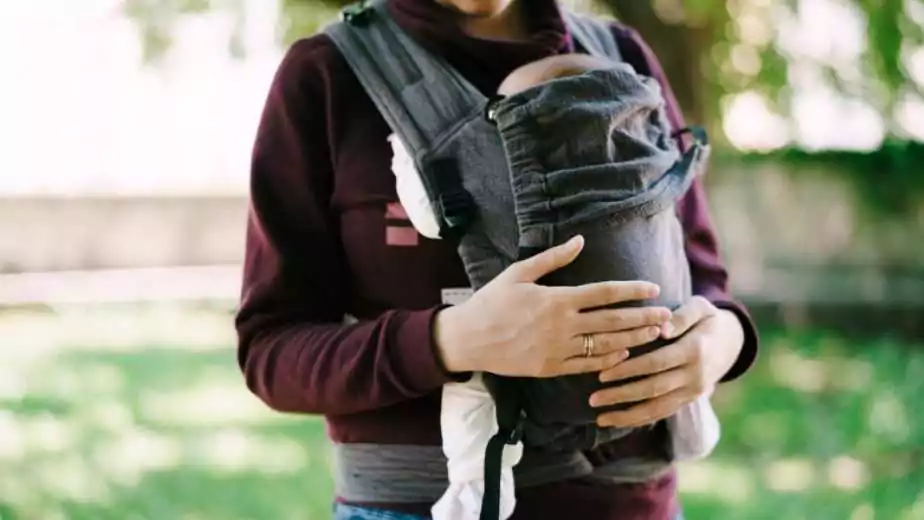
Structured Carrier
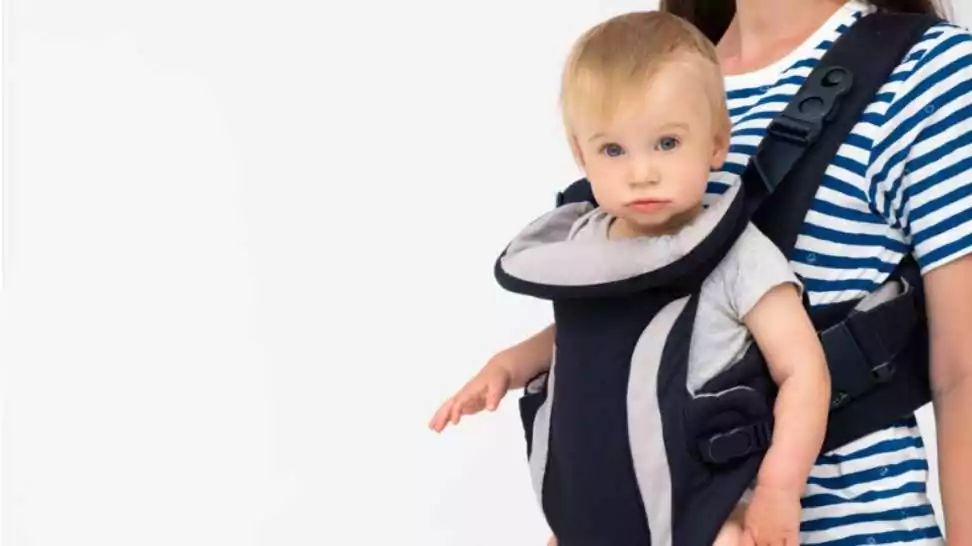
Structured carriers are designed with a built-in seat and adjustable straps and often include padded shoulder straps and a waist belt. These carriers provide excellent support for both the baby and the parent, distributing the baby’s weight evenly. They often come with added features like storage pockets and hoods for sun protection.
Structured carriers are generally suitable for babies from about 4-6 months old, when they have strong enough neck control, up to toddler age. They are ideal for active parents who need a carrier that is easy to put on and take off, and who may be carrying their child for extended periods, especially for outdoor activities or travel.
2 Materials and Tools Needed
Creating your baby carrier is not just a fulfilling project, but it’s also an opportunity to choose high-quality, safe materials that ensure your baby’s comfort and safety. Below, we’ll outline the essential fabrics, tools, and safety materials you’ll need to begin your DIY baby carrier project.
Fabrics and Their Benefits
- Cotton: Cotton is a popular choice for baby carriers due to its breathability, softness, and durability. It’s gentle against the baby’s skin and holds up well to frequent washing. Ideal for all types of carriers, cotton is versatile and comes in a variety of weights and weaves.
- Linen: Known for its strength and natural elegance, linen is another excellent choice. It’s highly breathable, making it perfect for use in warmer climates. Linen’s natural fibres offer a unique blend of comfort and durability, though it can be more expensive than cotton.
- Stretchy Jersey: For wraps especially, a stretchy jersey fabric can be ideal. It offers flexibility and a snug fit, hugging your baby close. Ensure the fabric has enough elasticity to support your baby’s weight while maintaining its shape.
Required Tools
- Sewing Machine: A good quality sewing machine is essential for ensuring strong, durable seams. If you’re a beginner, choose a machine with basic functions that are easy to navigate.
- Scissors: A sharp pair of fabric scissors will make cutting your materials much easier and more precise.
- Measuring Tape: Essential for taking accurate measurements of both the wearer and the baby to ensure a comfortable, custom fit.
Safety Materials
- Non-Toxic Dyes: If you’re opting to dye your fabric, ensure the dyes are non-toxic and safe for baby’s sensitive skin. Always wash the fabric thoroughly after dyeing.
- Sturdy Buckles and Rings: For structured carriers and Mei Tais, choose high-quality, sturdy buckles and rings that can withstand the weight of your baby and the rigours of daily use. They should be smooth without any sharp edges.
- Reinforced Stitching Materials: Use strong, durable thread and consider double stitching for added security, especially in areas that will bear the most weight.
3 Preparing to Make Your Baby Carrier
Measuring and Cutting Fabric
Measuring Baby and Wearer:
For the Baby: Measure the length from the baby’s shoulder to their knee to estimate the width of the carrier. This ensures the baby can be comfortably seated in the ‘M’ position, which is crucial for healthy hip development.
For the Wearer: Measure from one shoulder to the opposite hip and then double this length. This ensures that the carrier wraps around the wearer’s body comfortably.
Tips for Cutting Fabric Accurately:
Use a flat, stable surface and lay the fabric out without any wrinkles or folds.
Mark your measurements using a tailor’s chalk or a fabric marker before cutting.
Cut slowly and steadily, keeping the scissors flush against the surface to ensure straight lines.
Consider adding an extra inch to each measurement for hemming and adjustments.
Choosing the Right Design
Factors to Consider:
- Baby’s Age and Size: Newborns and smaller babies often require more support and a snug fit, while older babies may prefer more room to move and explore.
- Wearer’s Comfort: Consider the wearer’s body type, any back or shoulder issues, and the preferred carrying position (front, back, or hip).
Selecting a Design Based on Carrier Type:
- For Wraps: If you’re making a wrap, simplicity is key. A long, stretchy piece of fabric can be ideal. Choose a lightweight, breathable fabric for comfort.
- For Mei Tais: This carrier requires a rectangular fabric for the body and four long strips for the straps. Padded straps can be added for extra comfort.
- For Structured Carriers: These require more intricate designs with considerations for buckles, straps, and possibly a rigid frame. Choose a design that distributes weight evenly across the wearer’s hips and shoulders.
4 Step-by-Step Instructions for Making a Baby Carrier
Now that we have our materials, measurements, and designs, let’s dive into the actual crafting process. Below are step-by-step instructions for making each type of baby carrier: the Wrap, the Mei Tai, and the Structured Carrier.
Wrap Carrier
Sewing the Wrap:
- Cut your chosen fabric to the measured length and width. For most wraps, a length of about 5 to 6 yards and a width of 20-24 inches works well.
- Hem the edges to prevent fraying. Fold each edge over half an inch, iron flat, and then fold over again before sewing for a clean finish.
Ensuring Flexibility and Strength:
- Choose a stretchy fabric like a jersey for flexibility, but make sure it’s not too elastic. The wrap should offer support and not sag under your baby’s weight.
- Test the fabric’s stretch by pulling it slightly. It should return to its original shape without permanent deformation.
Mei Tai Carrier
Creating Shoulder and Waist Straps
- Cut four strips of fabric for the straps — two for the shoulders and two for the waist. Each should be about 3 inches wide and length according to your measurements.
- Fold the strips in half lengthwise, right sides together, and sew along the long edge. Turn them right side out and iron them flat.
Securing the Body Panel for Safety
- Cut a rectangular piece for the body panel. The size will depend on your baby’s age and size.
- Attach the waist straps to the bottom of the panel and shoulder straps to the top. Ensure they are triple-stitched for security.
Structured Carrier
Constructing a Sturdy Frame:
- For the frame, use a firmer fabric like canvas. Cut a rectangular piece for the back panel and two smaller pieces for the sides.
- Sew these pieces together, forming a pouch that will hold your baby. Ensure all seams are reinforced for strength.
Adding Padding and Adjustable Straps:
- Add padding to the shoulder straps for comfort. Use foam or thick fabric, and sew it into the straps before attaching them to the carrier.
- For adjustable straps, sew on buckles or clips, and ensure they are tested for strength. Add a waist belt with padding for extra support.
5 Safety Checks and Testing
After crafting your DIY baby carrier, the final and perhaps most crucial step is to ensure its safety and durability. This section guides how to conduct thorough safety checks and testing.
Ensuring Durability
Testing Seam Strength:
- To test the strength of your seams, gently pull the fabric on either side of the seam to ensure it holds firmly. Pay special attention to the areas where the straps meet the body of the carrier.
- Perform a visual inspection for any loose threads or gaps in the stitching.
Importance of Double-Stitching:
- Double-stitching, where you sew over the same seam twice, significantly enhances the strength and durability of your carrier.
- Focus on double-stitching areas that will bear the most weight, such as the seams attaching the straps to the body of the carrier.
Comfort Considerations
Adjusting for Ergonomic Support:
- Ensure the carrier supports your baby in a natural, ergonomic position, often referred to as the “M” position, where the baby’s knees are higher than their bottom.
- For the wearer, the carrier should distribute weight evenly to avoid strain on any one part of the body.
Padding for Baby and Wearer:
- Add padding in areas like the shoulder straps and around the leg openings for the baby’s comfort.
- Use soft, non-irritating fabrics for padding to prevent any discomfort or skin irritation.
Safety Testing
Weight Testing Tips:
- Before using the carrier with your baby, test it with a weight similar to your baby’s. You can use items like bags of flour or rice.
- Carry this weight around for a period to check for any signs of wear or weakness in the carrier.
Checking for Any Hazardous Parts:
- Examine the carrier for any sharp edges, loose buckles, or exposed hardware that could pose a risk.
- Ensure that all fabric dyes are non-toxic and safe for babies, as they often chew on parts of the carrier.
6 Customising Your Baby Carrier
One of the joys of creating your baby carrier is the ability to personalise it to your taste and needs. This section offers ideas for customization, making your carrier not just functional but also a reflection of your style.
Ideas for Personalisation
Choosing Colours and Patterns:
- Select colours or patterns that resonate with you. For a more timeless design, consider neutral colours. If you love the vibrancy, opt for bold patterns or bright colours.
- Remember to use safe, non-toxic dyes if you’re colouring the fabric yourself.
Adding Unique Touches:
- Embroider your baby’s name or a special date onto the carrier for a sentimental touch.
- Use different fabrics for various parts of the carrier (like straps and body) for a mix-and-match effect.
Adding Functional Elements
Pockets:
- Sew on a pocket or two for your essentials like keys, phone, or baby’s pacifier. Ensure these are securely attached and easily accessible.
Hoods:
- Add a detachable hood to protect your baby from the sun or to provide privacy during nap times. You can use snaps or buttons to attach it to the carrier.
Tips for Making it Adjustable for Growth
Adjustable Straps:
- Incorporate adjustable straps in your design. This ensures that the carrier can be resized for different wearers and as your baby grows.
- Use strong, durable materials for these straps, as they will be adjusted frequently.
Expandable Body Panel:
- Consider designing the carrier with an expandable body panel. This can be achieved by adding extra fabric that can be folded or unfolded as needed.
- Ensure that any adjustments maintain the carrier’s safety and ergonomic support for the baby.
7 Maintenance and Care of Your DIY Baby Carrier
A handmade baby carrier requires proper care to maintain its quality and ensure its longevity. This final section provides practical tips on washing, care, and storage of your DIY baby carrier.
Washing and Care Instructions
Regular Washing:
- Check the fabric care label if you’ve used store-bought fabric. Most baby carriers can be machine-washed in cold water on a gentle cycle.
- Use a mild, baby-safe detergent to avoid irritating your baby’s sensitive skin.
Dealing with Stains:
- Treat stains promptly with a gentle stain remover. Avoid using bleach, as it can weaken the fabric and cause irritation.
Drying:
- Air dry the carrier when possible, as high heat from dryers can damage the fabric or shrink it.
- If you must use a dryer, choose a low heat setting and remove the carrier while it’s still slightly damp to avoid over-drying.
Storage Tips
Maintaining Shape:
- When not in use, store your carrier in a cool, dry place.
- Avoid hanging it by the straps, as this can stretch them out. Instead, fold the carrier neatly or roll it up.
Preserving Fabric Integrity:
- Keep the carrier away from direct sunlight when storing, as prolonged exposure can fade the fabric.
- If storing for an extended period, consider placing it in a breathable fabric bag to protect it from dust and moisture.
Regular Checks:
- Periodically check the carrier for any signs of wear and tear, especially in high-stress areas like straps and seams.
- Address any issues immediately to ensure the carrier remains safe and comfortable to use.
8 Wrapping Up
In conclusion, creating your own DIY baby carrier is a meaningful way to connect with your child, blending the practicality of a necessary parenting tool with the personal touch of a handcrafted item. Each step, from choosing the right materials to adding unique customizations, enriches the bonding experience with your baby. Remember, the key to a successful DIY carrier lies in balancing safety, comfort, and personal style. This project isn’t just about making a carrier; it’s about crafting an enduring symbol of your love and dedication to your child’s well-being.
Community Q&A
About This Article

This article has been viewed 89 times.