How to Make a Baby Crib? A Step-by-Step Guide
Starting the journey of raising a child is an incredible and transformative period, brimming with excitement and new challenges. Among these is the important task of providing a safe, nurturing space for your baby’s rest and growth. A crib is more than just a place for sleep; it’s a secure, comforting haven where your little one will spend many hours.
Choosing to build a crib yourself adds an irreplaceable personal touch, enhancing the safety and comfort that a commercial crib might not offer. While building a crib may initially seem intimidating, it becomes a rewarding experience with proper guidance.
This blog will lead you step by step through the process of how to make a baby crib from scratch. Designed for anyone, from the experienced craftsman to the eager beginner, this guide aims to give you the tools and knowledge necessary to build a safe, beautiful resting place for your baby. Let’s start this meaningful and exciting journey together.
1 Planning Your Baby Crib
Understanding Safety Standards
Before delving into the design and construction, it’s crucial to prioritise the safety of your baby. Adhering to established safety standards for baby cribs can ensure your little one’s well-being. Key safety standards include:
- Spacing Between Slats: The slats of the crib should be no more than 2 3/8 inches apart. This prevents the baby’s head from getting trapped between them.
- Crib Height: Ensure the crib sides are high enough to prevent your baby from climbing out. A minimum height of 26 inches from the mattress base is advisable.
- Sturdy Construction: The crib must be structurally sound to withstand a baby’s movements without collapsing or tipping over.
- No Sharp Edges or Protruding Screws: Ensure all surfaces are smooth, and hardware is flush with the crib, to prevent injury.
Keep these safety standards in mind throughout the planning and building process.
Choosing the Right Materials

Selecting the right material is essential for both safety and aesthetics. Hardwoods like maple, oak, or cherry are preferred for their durability and non-toxicity. Softwoods like pine are more affordable but less durable. Whichever wood you choose, ensure it’s untreated and free from harmful chemicals. Also, consider non-wood materials like screws and fasteners, ensuring they are rust-proof and sturdy.
Tools and Equipment Needed
To build a crib, you’ll need a variety of tools. Here’s a basic list:
- Measuring Tape and Ruler: Precision is key in ensuring safety.
- Saw: A circular saw or hand saw for cutting wood to the right dimensions.
- Drill: For making holes for screws.
- Sander: To smooth out any rough surfaces and edges.
- Screwdriver: For assembling parts.
- Clamps: To hold pieces together while they are being joined.
- Wood Glue: For extra reinforcement on joints.
Remember, good quality tools not only make the job easier but also safer.
2 Designing the Crib
Drawing a Blueprint
The first step in designing your crib is to create a detailed blueprint. This blueprint will serve as your roadmap, guiding you through each stage of the construction process. Start by sketching a simple outline of the crib, including a bird’s eye view, side view, and end view. Include dimensions in your drawings to ensure precision in construction.
When drawing your blueprint, consider the following:
- Overall Shape and Structure: Decide whether you want a traditional rectangular crib, a round crib, or a more unique shape.
- Railings and Slats: Detail the spacing and height of the railings and slats, keeping in mind the safety standards.
- Base and Mattress Support: Outline how the base will be constructed to securely support the mattress.
- Joinery Details: Specify the types of joints you plan to use, such as dovetail or mortise and tenon, for a sturdy construction.
Deciding on Size and Features
When it comes to size, most standard cribs are approximately 28 inches by 52 inches. However, you have the flexibility to modify these dimensions based on your needs and space availability.
Additionally, consider incorporating versatile features into your crib design:
- Convertible Designs: A convertible crib can transform into a toddler bed, day bed, or even a full-sized bed, offering a piece of furniture that grows with your child.
- Adjustable Mattress Height: Designing the crib with adjustable mattress heights can accommodate your baby’s growth and make it easier to lift them in and out.
- Storage Options: Consider adding drawers or shelves beneath the crib for convenient storage of baby essentials.
3 Preparing the Materials
Cutting and Sanding Wood
Step 1: Measuring and Marking
- Begin by carefully measuring the wood according to your blueprint dimensions.
- Use a pencil to mark where you will cut. Ensure that all lines are straight and accurate.
Step 2: Cutting the Wood
- Secure the wood on a stable surface.
- Using a circular saw or handsaw, follow your pencil lines to cut the wood. Always wear safety goggles and follow safety precautions.
- For intricate cuts or curves, consider using a jigsaw.
Step 3: Sanding
- Once all pieces are cut, use a sander to smooth all surfaces and edges.
- Start with a coarse grit sandpaper and gradually move to finer grits for a smooth finish.
- Pay special attention to the areas where the baby might reach, ensuring there are no splinters or rough edges.
Assembling the Base and Sides
Assembling the Base Frame
- Lay out the cut pieces for the base frame on a flat surface.
- Apply wood glue to the joining edges for added strength.
- Use clamps to hold the pieces in place and drill pilot holes for screws.
- Secure the frame together using screws, ensuring that the frame is square and stable.
Attaching the Sides
- Stand the base frame upright.
- Align the side panels to the base frame. The slats must be facing inward.
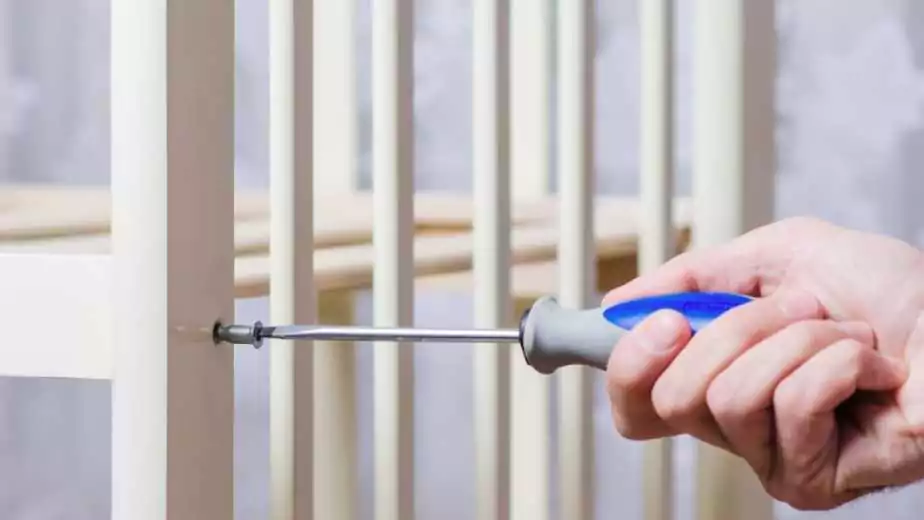
- Drill pilot holes and then attach the sides using screws. Do not fully tighten the screws until all sides are aligned correctly.
- Ensure that the structure is sturdy and there are no wobbles.
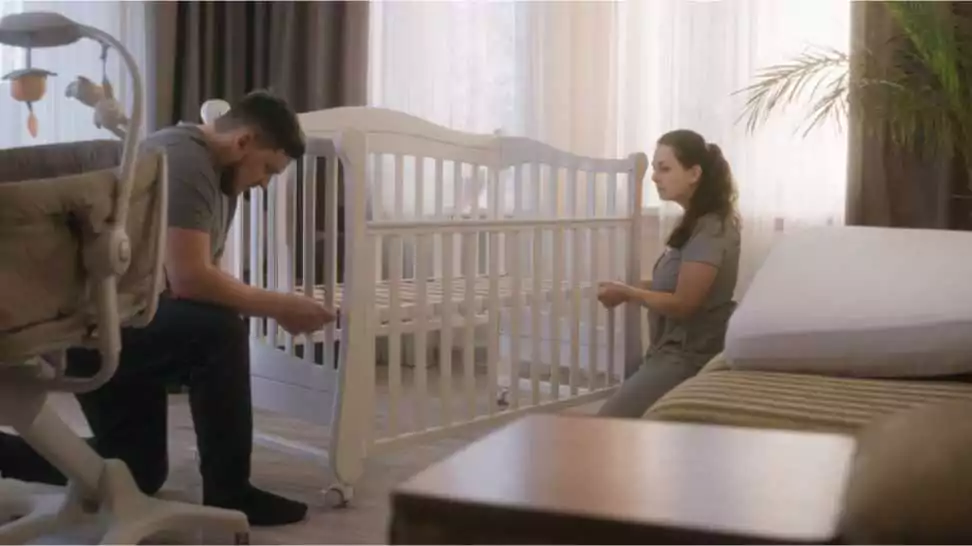
4 Assembling the Crib
Attaching the Sides to the Base
Once the base frame and the sides are prepared, it’s time to bring them together:
- Position the Sides: Stand the base frame in its intended location. Then, position the side panels against the base frame, ensuring they align correctly with the base.
- Secure the Joints: Using a drill, create pilot holes at the points where the side panels connect to the base. This prevents the wood from splitting.
- Fasten with Screws: Attach the sides to the base using screws, ensuring each screw is tightly fastened for a secure fit. Avoid over-tightening, which could strip the wood.
- Check for Gaps: Make sure there are no gaps between the base and the sides. Any gaps could be a safety hazard.
Adding the Mattress Support

Installing a safe and sturdy mattress support is crucial:
- Position the Support Slats: Lay out the slats or the solid base that will support the mattress. These should fit snugly within the frame without being forced.
- Secure the Slats/Base: Attach the slats or base to the frame. If using slats, ensure they are evenly spaced (no more than 2 3/8 inches apart) and securely fastened to the frame.
- Adjustable Height: If your design includes adjustable mattress height, install the necessary hardware and ensure it operates smoothly and locks securely.
Ensuring Stability and Safety
The final step is to double-check the crib’s stability and safety:
- Stability Test: Gently shake the assembled crib to check for any wobbles or instability. Tighten any loose screws and ensure all joints are firm.
- Inspect for Sharp Edges: Run your hands along all surfaces to check for sharp edges or splinters. Any rough areas should be sanded down.
- Final Safety Check: Refer back to the safety standards. Ensure the slats are the correct distance apart, the crib is free from small, detachable parts, and there are no protruding screws or rough edges.
- Regular Checks: Remember, periodic checks and maintenance of the crib are essential to ensure ongoing safety as your baby grows.
5 Finishing Touches
Painting and Decorating
After the crib is assembled, adding a personal touch with paint and decorations can make it even more special. Here are some ideas and safety tips:
- Choose Safe Paints: Opt for non-toxic, lead-free, and VOC-free paints. These are safe for babies and do not emit harmful fumes.
- Selecting Colours: Soft, soothing colours are often preferred for nurseries. You can also choose a colour that matches the theme of the nursery.
- Painting Tips: Apply a primer first if you’re painting over bare wood. Use multiple thin coats of paint rather than a single thick coat for a smoother finish. Allow ample drying time between coats.
- Decorations: Consider adding stencils, decals, or hand-painted designs. Ensure any added decorations are securely attached and non-detachable to avoid choking hazards.
Adding a Mattress and Bedding
The right mattress and bedding are crucial for your baby’s comfort and safety:
- Mattress Selection: Choose a firm mattress that fits snugly within the crib, with no more than two fingers of space between the mattress and the crib’s sides.
- Mattress Cover: A waterproof mattress cover can protect against spills and is easy to clean.
- Bedding Essentials: Opt for fitted sheets that snugly wrap around the mattress. Avoid loose bedding, pillows, and plush toys in the crib to reduce the risk of Sudden Infant Death Syndrome (SIDS).
- Fabric Choice: Select breathable, hypoallergenic fabrics for the sheets, like cotton or bamboo, to ensure your baby’s comfort.
6 Wrapping Up
In conclusion, our journey through building a baby crib from scratch has covered everything from adhering to safety standards and selecting materials to designing, assembling, and adding personal touches. This DIY project transcends mere craftsmanship; it’s a heartfelt expression of your care and commitment to your child’s safety and comfort.
Your experience and the unique crib you’ve created can be a source of inspiration for others, so feel free to share your story and results with our community.
Thank you for being a part of this guide. May the joy and pride of building your baby’s crib by hand enrich your family’s story. Happy building!
Community Q&A
About This Article

This article has been viewed 85 times.