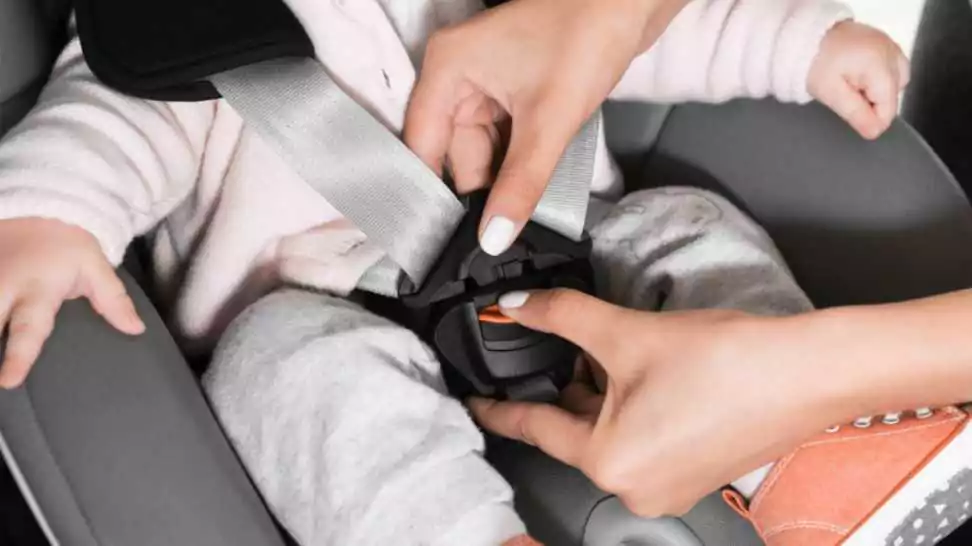
How To Install Infant Car Seat? Step-by-Step

Ensuring the safety of our little ones is a paramount concern for every parent, especially when it comes to traveling by car. The installation of an infant car seat is not just a legal requirement; it’s a crucial step in safeguarding your child’s well-being on the road. However, the process can often seem daunting, especially for new parents.
Recent statistics paint a concerning picture: a significant number of car accidents involving young children are linked to improperly installed car seats. These figures aren’t just numbers; they represent real families who have faced unthinkable scenarios, often due to simple installation errors.
But here’s the reassuring news: with the right guidance, installing an infant car seat correctly and safely is an achievable task for every parent. This comprehensive guide is designed to figure out how to install infant car seat, ensuring that your little one’s car seat is as secure and safe as possible. Whether you’re a first-time parent or just need a refresher, our guide will provide you with the knowledge and confidence to protect your child effectively on every journey.
1 Understanding Car Seat Types and Choosing the Right One

When it comes to selecting a car seat for your infant, the array of choices can be overwhelming. It’s crucial to understand the different types of car seats available and how they cater to various stages of your child’s growth. Primarily, there are three types of car seats: rear-facing, convertible, and all-in-one. Each serves a specific purpose and is designed to accommodate children of different ages and sizes.
Rear-Facing Car Seats
For infants, the rear-facing car seat is the most recommended type. These seats are designed to support the baby’s head, neck, and spine more effectively in the event of a sudden stop or crash. They are used from birth until your child reaches the seat’s height or weight limit, which typically occurs around the age of 2 to 4 years.
Convertible Car Seats
Convertible car seats are designed to grow with your child. They can be used as rear-facing seats for infants and then converted to forward-facing seats for older children. While they offer a long-term solution, they might not provide the snug fit that is ideal for newborns.
All-in-One Car Seats
All-in-one car seats offer the most versatility. They can change from a rear-facing infant seat to a forward-facing seat and then to a booster seat for older children. While they are cost-effective in the long run, they may not offer the best fit for very young infants.
Factors to Consider When Choosing a Car Seat
When selecting the right car seat for your infant, consider the following factors:
- Car Size: The car seat should fit well in your vehicle. Some seats are wider or have larger bases, which may not fit comfortably in smaller cars.
- Baby’s Weight and Height: Each car seat has specific weight and height limits. Choose a seat that accommodates your baby’s current size and offers room to grow.
- Ease of Installation: Look for a car seat that you can install and remove with ease. This is particularly important if you will need to switch seats between vehicles frequently.
2 Pre-Installation Checklist
Before you begin the physical installation of your infant’s car seat, it’s critical to perform a thorough pre-installation check. This preparatory step ensures that you are fully informed about your vehicle’s specific features and the car seat’s requirements. Here’s what you need to cover in your pre-installation checklist:

Understanding Your Vehicle's Car Seat Anchors and Seat Belt System
Most modern vehicles are equipped with a LATCH system (Lower Anchors and Tethers for Children), which is designed to make car seat installation easier and safer. Familiarize yourself with the location of these anchors in your vehicle. They are typically found in the rear seats and are integral to securing the car seat properly.
If your vehicle does not have the LATCH system, you’ll need to use the seat belt to secure the car seat. Understand how your seat belts lock, as many have a retractor system or a locking mechanism to keep the belt tight when used with a car seat.
Reading Both the Car Seat and Vehicle Manuals
Each car seat and vehicle comes with its own set of installation instructions and recommendations. It’s crucial to read both manuals carefully. The car seat manual will provide specific instructions on how to install the seat using either the LATCH system or a seat belt.
Meanwhile, your vehicle manual will offer guidance on how to properly use the LATCH system or seat belts for car seat installation and indicate any areas in the vehicle that are not suitable for securing a car seat.
Importance of Choosing the Right Location in the Car

Selecting the right location to install your infant’s car seat is just as important as the installation process itself. The safest place for an infant car seat is in the back seat, away from active airbags. The middle of the back seat is often recommended as the safest spot in the vehicle, as it is the furthest from any potential impact points. However, it’s essential to check your vehicle manual as some cars have specific recommendations or restrictions about car seat placement.
3 Step-by-Step Installation Guide
Installing an infant car seat can seem complex, but by following these step-by-step instructions, you can ensure your baby’s safety and peace of mind. We’ll cover two primary methods: using the LATCH system and using the vehicle’s seat belt.
Installing with a Base Using the LATCH System

Locate the LATCH Anchors: Find the lower anchors in your vehicle’s back seat. They’re usually found between the seat’s back and bottom.
Attach the Base: Position the car seat base on the vehicle seat. Align the base’s LATCH connectors with your vehicle’s anchors and click them in place.
Tighten the Base: Once connected, push down firmly on the base and pull the LATCH strap to tighten. The base should not move side-to-side or front-to-back more than an inch when tested at the belt path.
Check the Angle: Ensure the base is at the correct angle for your infant. Most car seat bases have built-in angle indicators or adjusters to help you get the right recline.
Alternate Method: Installing with a Vehicle Seat Belt
- Position the Base: Place the car seat base on the vehicle seat in the rear-facing position.
- Thread the Seat Belt: Open the belt path on the base and thread the vehicle’s seat belt through it. Ensure there are no twists in the belt.
- Buckle and Lock the Seat Belt: Buckle the seat belt and then pull the shoulder part of the belt to tighten it. If your vehicle’s seat belts have a locking mode for car seats, engage it according to the vehicle manual.
- Check the Base’s Stability: Like with the LATCH method, the base should not move more than an inch in any direction.

Ensuring Correct Recline Angle and Stability
Regardless of the installation method, it’s critical to ensure that the car seat is at the proper recline angle for an infant. This angle prevents your baby’s head from flopping forward and obstructing their breathing. Use the angle indicators or adjusters on the car seat or base to set the correct angle.
After installation, check for tightness and stability. The car seat should feel securely attached to the seat with minimal movement. If the seat wobbles or shifts, re-tighten the LATCH straps or the seat belt, and check the angle again.
4 Safety Tips and Common Mistakes to Avoid
Once the car seat is installed, it’s vital to focus on the correct use of the harness and to be aware of common mistakes that can compromise the safety of the seat. Here are key safety tips and mistakes to avoid:
Ensuring the Harness is Snug and Properly Positioned

A properly positioned harness is crucial for your infant’s safety in the car seat. The straps should lie flat without any twists and should be snug against your child’s body.
- Harness Height: For rear-facing seats, the harness straps should be at or just below your child’s shoulders.
- Chest Clip Position: The chest clip should be at armpit level, ensuring that the harness remains in the correct position.
The Pinch Test for Harness Tightness
The pinch test is a quick and effective way to check if the harness is tight enough. After buckling your child in and tightening the harness, try to pinch the harness strap at the child’s shoulder. If you can pinch a fold in the strap, the harness is too loose and needs to be tightened until no excess material can be pinched.
Common Mistakes to Avoid
Avoiding common mistakes can significantly enhance the safety of your child in their car seat:
- Adding Additional Padding: Do not add extra padding, inserts, or pillows that do not come with the car seat. These can interfere with the seat’s design and reduce its effectiveness in a crash.
- Using Second-Hand Seats Without Knowing Their History: Be cautious about using second-hand car seats. Avoid using a car seat if you don’t know its history, as it may have been involved in an accident or could be past its expiration date.
- Loose Installation: Ensure that the car seat does not move more than an inch at the belt path after installation.
- Improper Recline Angle: An incorrect recline angle can cause your infant’s head to flop forward, obstructing their airway. Always adhere to the recommended angle for your child’s age and size.
5 Post-Installation Checks and Maintenance

After installing the car seat, it’s essential to perform regular checks and maintenance to ensure ongoing safety for your child. Here’s what you need to know about post-installation checks and keeping the car seat in top condition.
How to Test if the Seat is Securely Installed?
- The Inch Test: After installing the car seat, give it a good shake at the base. A properly installed seat should not move more than an inch side-to-side or front-to-back.
- Recheck Regularly: Over time, the seat can loosen in the car. Make it a habit to test the seat before each trip, especially after removing or adjusting it.
Regular Maintenance Tips for Car Seats

Keeping the car seat clean and in good condition is vital for its effectiveness and longevity.
- Cleaning: Follow the manufacturer’s instructions for cleaning the seat. Use gentle cleaners to avoid damaging any materials. Regularly clean crumbs and spills to prevent any build-up that could interfere with the seat’s mechanisms.
- Checking for Wear and Tear: Regularly inspect the car seat for any signs of wear, such as frayed straps or cracks in the plastic. Check the expiration date on the seat as well, as materials can degrade over time.
When to Transition to a Different Car Seat?
As your baby grows, their car seat needs will change. Here’s how to know when it’s time to transition:
- Height and Weight Limits: Each car seat has specific height and weight limits. Transition your child to a different seat when they reach these limits. For most infant seats, this will be when your child’s head is less than an inch from the top of the seat or they exceed the weight limit.
- Switch from Rear-Facing to Forward-Facing: As recommended by child safety experts, keep your child in a rear-facing seat for as long as possible, at least until they are 2 years old. Consider transitioning to a convertible or all-in-one seat that can be used forward-facing when they outgrow the rear-facing limit.
- Booster Seats: Typically, children are ready for booster seats when they are at least 4 years old and weigh at least 40 pounds, but always follow the guidelines specific to your car seat model.
6 Wrapping Up
In summary, the proper installation and maintenance of an infant car seat are crucial for your child’s safety during car rides. Ensuring correct installation reduces injury risks and provides peace of mind.
Always double-check the car seat before trips, paying attention to the harness fit, seat stability, and recline angle. These practices, though simple, are vital for your child’s safety and will become a routine part of your travel preparations.
We invite you to share your own car seat experiences, tips, or questions in the comments. Your insights can help enrich our parenting community. Together, we can make each journey safer for our little ones.
Community Q&A
About This Article
This article has been viewed 101 times.


