
How To Lock a Folder in Windows 11?
When it comes to protecting your personal files and folders on your computer, knowing how to lock a folder in Windows 11 is an essential skill. This comprehensive guide will walk you through various techniques on how to lock a folder in Windows 11. From built-in methods to using third-party software, this post covers everything you need to know.
Before we delve into how to lock a folder in Windows 11, let’s talk a bit about the operating system itself. Windows 11 is Microsoft’s latest OS, offering a plethora of new features and a revamped interface. One of the features that has always been important for users is security. This article will focus on the security aspect, particularly how to lock a folder in Windows 11.
1 Why Lock a Folder?
There could be multiple reasons why one would want to know how to lock a folder in Windows 11. You might have sensitive documents, pictures, or files that you do not want others to access. With the ever-increasing threats of data breaches, knowing how to lock a folder in Windows 11 becomes even more critical.
2 Method 1: Using File Explorer
Step 1: Open File Explorer
Start by opening File Explorer on your Windows 11 system. Locate the folder you wish to lock.
Step 2: Right-click on the Folder
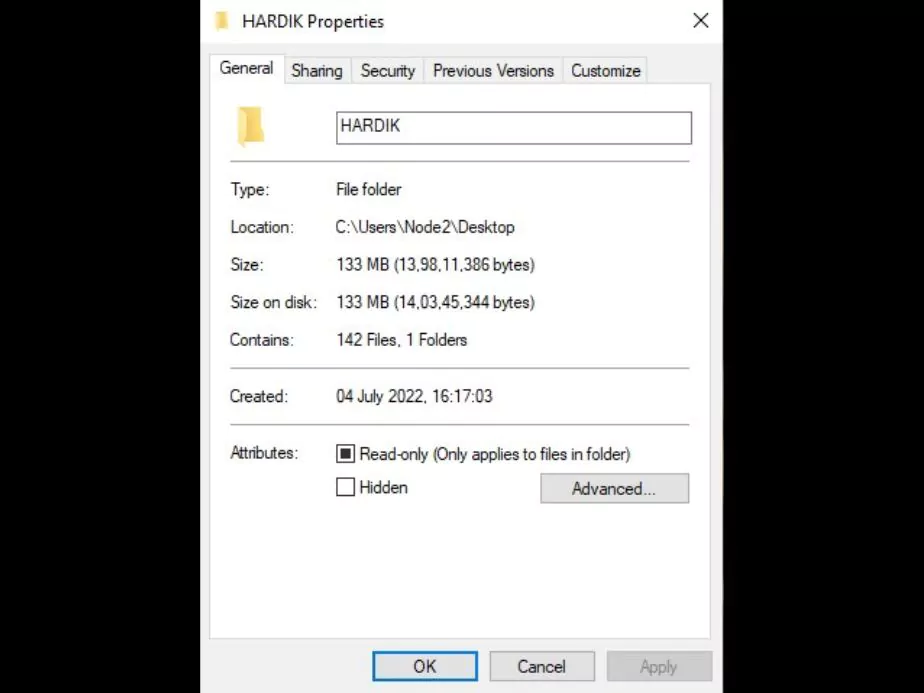
Once you’ve located the folder, right-click on it, and choose ‘Properties‘.
Step 3: Navigate to the Security Tab
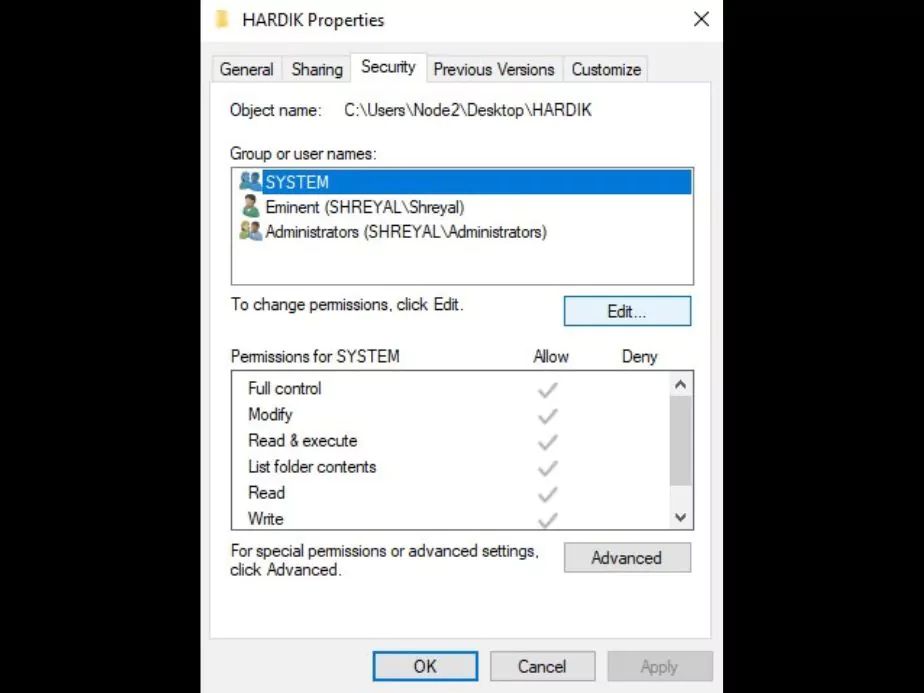
In the Properties window, go to the ‘Security’ tab. This is where you can set permissions and learn how to lock a folder in Windows 11.
Step 4: Edit Permissions
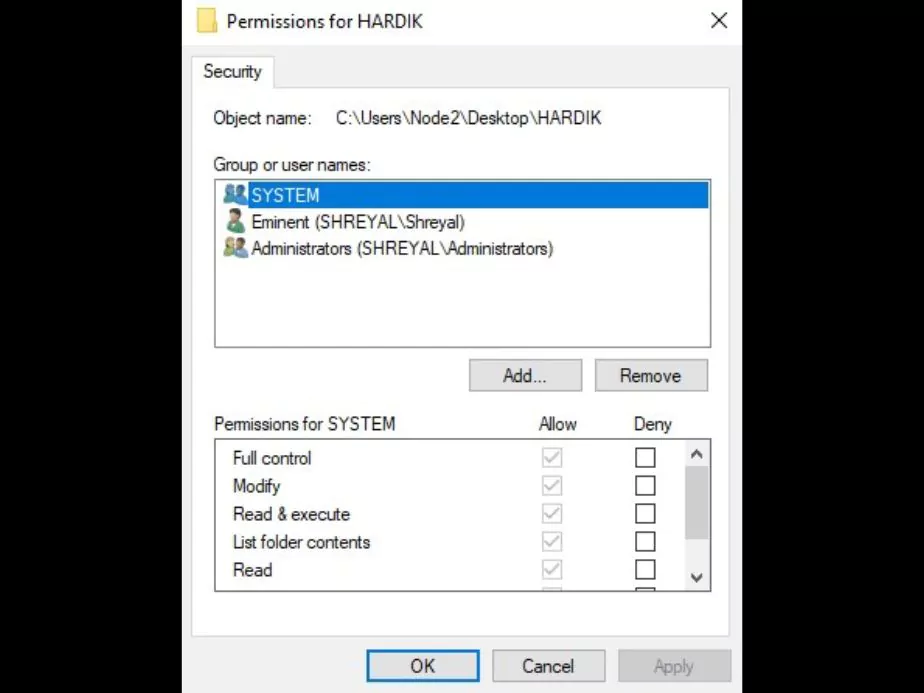
Click on ‘Edit’ and then choose the user account you want to restrict access to. Under Permissions, check ‘Deny’ next to ‘Full control’. Click ‘Apply’ and then ‘OK’.
By doing this, you have just locked the folder and restricted access.
3 Method 2: Using BitLocker
Another approach how to lock a folder in Windows 11 is using BitLocker, a built-in encryption tool.
Step 1: Open File Explorer
Like before, open File Explorer and right-click on the drive containing the folder you want to lock.
Step 2: Turn on BitLocker
Select ‘Turn on BitLocker’. This will open the BitLocker setup wizard.
Step 3: Follow the Setup Wizard
Follow the wizard to encrypt the drive. Make sure to save the recovery key in case you forget your password.
Step 4: Lock the Drive
Once encrypted, you can lock the drive by ejecting it. To access it again, you’ll need the password.
4 Method 3: Using Batch Files
For those who prefer scripting, here’s how to lock a folder in Windows 11 using batch files.
Step 1: Create a New Text Document
Right-click on your desktop, select ‘New’, and then ‘Text Document’.
Step 2: Write the Batch Script
Open the text document and write a batch script for password protection. Save the file with a “.bat” extension.
Step 3: Run the Batch File
Double-click the batch file to create a locker. Set a password.
Step 4: Move Files to the Locker
Move the files you want to lock into the new locker folder.
Step 5: Lock the Folder
Run the batch file again and enter ‘Y’ to lock the folder.
5 Method 4: Third-Party Software
Knowing how to lock a folder in Windows 11 using third-party software can be handy. Software like Folder Lock, 7-Zip, or VeraCrypt can make the process even simpler.
Step 1: Choose and Download a Third-Party Software
There are several options available. For this guide, let’s take Folder Lock as an example. Go to the official Folder Lock website and download the software.
Step 2: Install the Software
Follow the installation wizard to install Folder Lock on your Windows 11 system.
Step 3: Set a Master Password
After the installation is complete, open Folder Lock and set a master password. This will be used to access all the folders you lock.
Step 4: Lock the Folder
Click on ‘Add Items to Lock’ and select the folder you want to lock. It will now be locked and only accessible via Folder Lock with the master password.
6 Additional Tips for Locking a Folder in Windows 11
Knowing how to lock a folder in Windows 11 is great, but it’s also important to keep some additional tips in mind for enhanced security:
- Backup Important Data: Before you lock folders, it’s always a good practice to back up your data. In case something goes wrong, you won’t lose important files.
- Strong Passwords: Whether you are using BitLocker or third-party software, always use strong passwords. Mix uppercase and lowercase letters, numbers, and special characters.
- Regularly Update Software: Make sure that the third-party software you use to lock folders is up to date. This ensures you have the latest security features.
- Avoid Writing Passwords on Paper: Writing down passwords can make them easily accessible to someone else. Try to memorise them or use a password manager.
7 Wrapping Up
Learning how to lock a folder in Windows 11 is an essential skill in this digital age where data privacy and security are paramount. From using the built-in features of File Explorer and BitLocker to employing batch scripts and third-party software, there are several methods to achieve this. Each method has its advantages and is suited for different levels of technical expertise.
What’s important is that by knowing how to lock a folder in Windows 11, you are taking a proactive step in safeguarding your personal and sensitive information. Be sure also to follow the additional tips mentioned to enhance the security of your locked folders further.
Whether you’re a student, a professional, or someone who simply wants to keep their data safe, understanding how to lock a folder in Windows 11 is an invaluable asset in your skill set.
We hope this comprehensive guide on how to lock a folder in Windows 11 proves to be the ultimate resource for securing your files and folders. Keep your data safe, and keep exploring the myriad of features that Windows 11 has to offer!
Community Q&A
About This Article

This article has been viewed 487 times.

Featured Articles
 7 Best Laptops under 30000 Rupees to Buy in 2024
 How to Format Laptop Windows 10 and 7 – Step by Step Guide