
Mastering the Basics: How to Partition SSD in Windows 11

In the digital era, where data reigns supreme, having an efficient and organised storage system is essential for every computer user. And what better way to supercharge your storage capabilities than by harnessing the power of a solid-state drive (SSD) with the cutting-edge Windows 11 operating system?
Let’s start by understanding why we should partition an SSD? Imagine a vast warehouse without any shelves or compartments—finding what you need would be a nightmare! The same principle applies to your SSD. By partitioning your drive, you create logical divisions that organise and segregate your data, enhancing accessibility, security, and overall system performance.
In this comprehensive guide, we will navigate through the step-by-step process of how to partition SSD in Windows 11, exploring the built-in tools and expert techniques to optimise your storage to perfection. So, prepare to embark on an exciting adventure where we unlock the full potential of your SSD, harnessing its power to transform your computing experience. Let’s dive in and master the art of partitioning in Windows 11!
1 Understanding SSD and Partitioning
An SSD, or Solid State Drive, is a type of storage device that uses integrated circuit assemblies to store data. It’s faster and more reliable than traditional Hard Disk Drives (HDD).
Partitioning, on the other hand, is a process that divides your hard drive into multiple distinct sections. Each partition works as if it’s a separate hard drive. This process allows you to manage and organise your files more effectively. You can also have multiple operating systems on a single SSD by using partitions.
Step 1: Backup Your Data
Before you begin, make sure you’ve backed up all the essential data on your SSD. Manipulating disk partitions always carries a risk of data loss, so it’s better to be safe than sorry. You can use the built-in Windows Backup utility or a third-party tool of your choice.
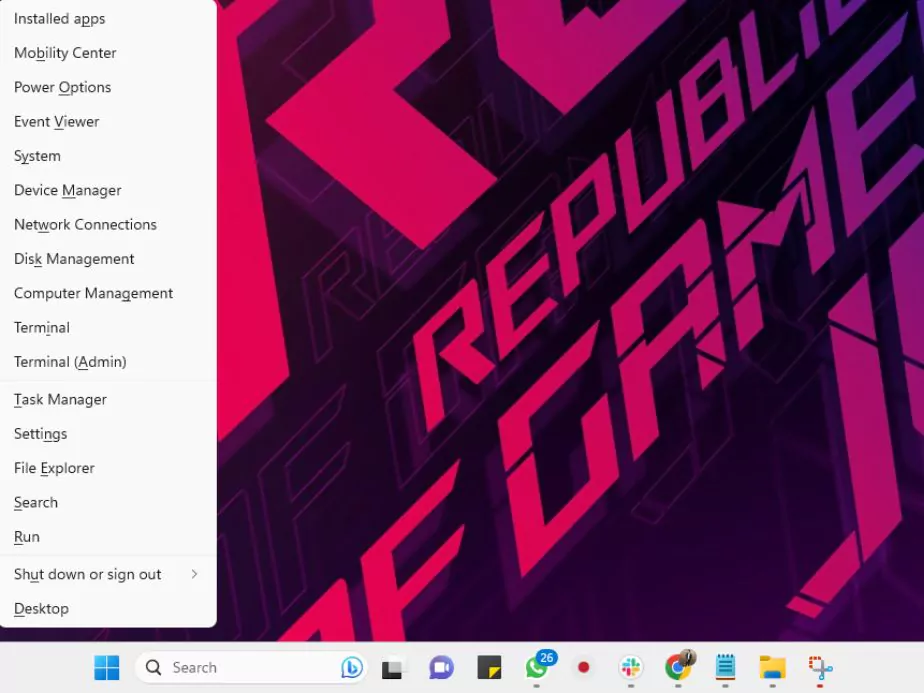
Step 2: Open Disk Management
- Right-click the Start button in the lower-left corner of the screen, or use the shortcut Windows Key + X.
- From the pop-up menu, click on Disk Management.
The Disk Management window gives you an overview of all the storage devices and their partitions on your computer.
Step 3: Analyse the Disk Space
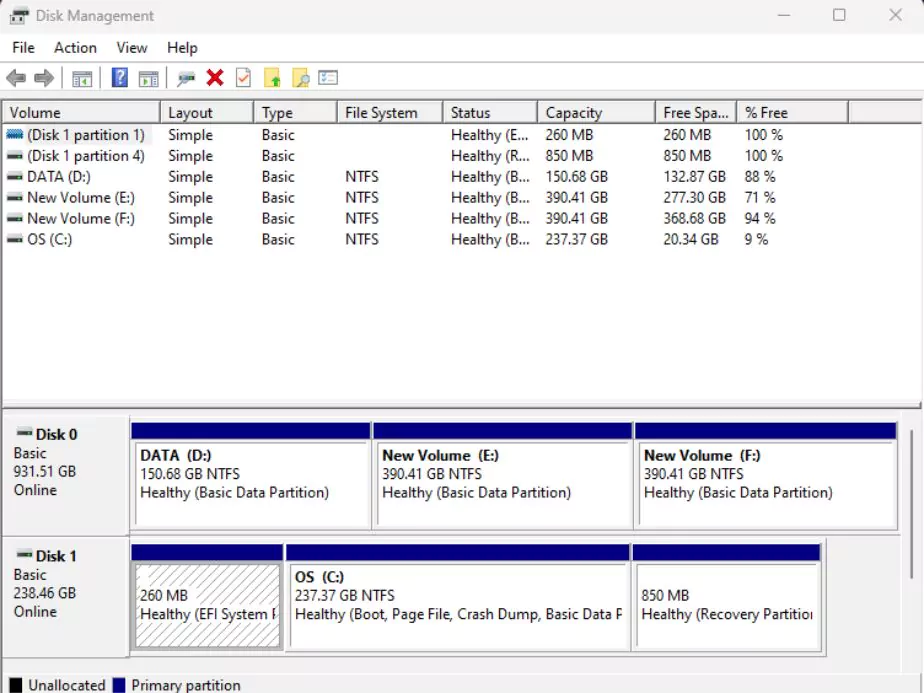
Before proceeding, take a moment to analyse your SSD’s storage situation. Note the volume of data, the amount of free space available, and the number of partitions already present.
Step 4: Shrink an Existing Volume
To create a new partition, you need unallocated space on your SSD. If your SSD is full, you will have to shrink an existing volume to create space.
- Right-click the volume you want to shrink.
- From the context menu, select Shrink Volume…
- Enter the amount of space to shrink in MB. Windows will suggest the maximum amount of shrinkable space. Remember, 1024 MB equals 1 GB.
- Click on the Shrink button to execute.
The process may take a few minutes, depending on the volume of data. Once done, you’ll see unallocated space on your SSD.
Step 5: Create a New Partition
Now that you have unallocated space, you can create a new partition:
- Right-click on the unallocated space.
- Select New Simple Volume…
- In the New Simple Volume Wizard that opens, click Next.
- Specify the size of the volume. The maximum default size will be the amount of unallocated space you have.
- Click Next.
Step 6: Assign a Drive Letter or Path
- In the wizard, you’ll be asked to assign a drive letter or path. Choose a drive letter not already in use.
- Click Next.
Step 7: Format the Partition
In the next window, you’ll format the partition. Ensure to use NTFS for the best compatibility with Windows software. Here’s how to do it:
- Select NTFS in the File System drop-down menu.
- Leave the Allocation unit size as Default.
- You can name your volume in the Volume label field.
- Make sure Perform a quick format is checked.
- Click Next.
Step 8: Review and Complete the Process
Review your choices in the summary presented. If everything is correct, click Finish. Windows will format the new partition, which may take a few minutes. After this process, your new partition should be visible and accessible in File Explorer.
2 Tips for SSD Partition Management
- Avoid Multiple Partitions: While partitioning your SSD can be useful, avoid creating too many partitions. It’s usually best to have one for your operating system and applications and another for personal files. Over-partitioning can reduce your SSD ‘s efficiency and lifespan due to excessive write operations distributed across multiple partitions.
- Regularly Monitor SSD Health: Regular health checks can ensure your SSD operates optimally. Use built-in Windows tools or third-party applications to monitor your SSD’s health and take preventive measures if any issues arise.
- Avoid Filling SSDs to Capacity: Always leave some free space in your SSD. When SSDs get near their capacity, their performance may decline. As a rule of thumb, keep at least 10% of your SSD space free.
- Avoid Defragmentation: Unlike traditional HDDs, SSDs do not benefit from defragmentation and, in fact, can be harmed by it due to unnecessary write operations. Windows 11 should automatically disable defragmentation for SSDs, but it’s worth double-checking.
3 Wrapping Up
Partitioning an SSD in Windows 11 is an easy task that you can do yourself with the Disk Management tool. Whether you want to keep your files organised, run multiple operating systems, or isolate sensitive data, partitions can be incredibly beneficial. Remember to back up your data, plan your partition strategy wisely, and keep your SSD’s health in check to maximise its lifespan and performance.
Now that you have learned to partition an SSD on Windows 11, you can apply these skills to manage your data more effectively. Should you encounter any problems during the process, remember to seek professional help to prevent data loss or damage to your SSD. With a little practice and these instructions by your side, you should be well-equipped to handle this task efficiently.
Partitioning your SSD can be the first step towards efficient data management. It gives you control over your storage space, allowing you to maximise the benefits of your SSD. Happy partitioning!
FAQ's about SSD Partition in Windows 11
Can partitioning damage the SSD?
No, partitioning in itself does not cause damage to an SSD. However, improper partitioning can lead to data loss.
Can I resize my partitions?
Yes, you can resize your partitions using the same Disk Management tool. This is useful if your needs change over time.
Can I delete a partition?
Yes, but be aware that this will permanently delete all data on the partition. Always back up any important files before deleting a partition.
What should I do if I encounter an error during partitioning?
If you encounter any errors during the partitioning process, it’s recommended to seek professional help. Do not attempt to resolve the issue on your own as it may lead to data loss or other severe problems.
Community Q&A
About This Article

This article has been viewed 865 times.

Featured Articles
 7 Best Laptops under 30000 Rupees to Buy in 2024
 How to Format Laptop Windows 10 and 7 – Step by Step Guide